
I posted recently about why it took me so long to go through my Antelope Canyon images. It was pretty simple: they required a lot of processing. For those that are interested, I’ll share some details about how much processing that entailed.

As I mentioned, I took bracketed shots of each image to capture detail in both the shadows and highlights. I shot series of 3, 5, and sometimes 7 images varying exposure by -2 to +1 stops. The result was over 2000 images, which represented about 600 individual shots. My intended workflow was to combine the bracketed exposures into a single HDR (High Dynamic Range) image for each shot, culling them to toss out the ones I didn’t like, then edit the rest. I deliberately combined all of the images up front instead of culling as I’d only have to look at 600 things instead of 2000.
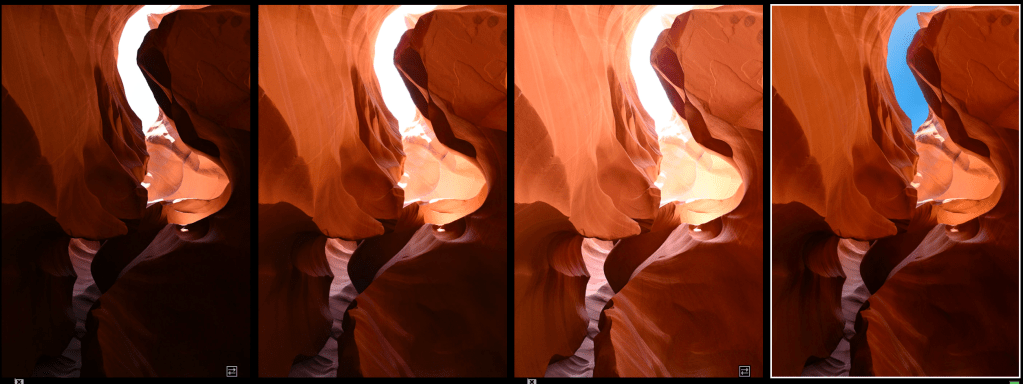
To create the HDR images I had Lightroom stack the images by capture time, grouping images that were taken within one second of each other. Lightroom can batch process multiple stacks of images, so I sent the entire batch through its HDR merge function. This took hours to complete because this particular operation is not well-optimized for multiple CPU cores (it’s 2025, bro!) and doesn’t use the GPU. I ran it overnight so that images were ready in the morning.


I filtered down to the HDR images and culled them, flagging the ones I wanted to further process. This reduced my list down to about 300 images. When processing the HDRs I allowed Lightroom to apply its automatic adjustments, which tend to be too aggressive for me, so the first thing I did was to reset contrast, saturation, and vibrance before selectively adjusting exposure, shadows, and highlights to soften the automatic effect. I started applying masks to selectively brighten shadows, recover highlights, and adjust contrast. I took advantage of Lightroom’s object detection masks and they did a pretty good job tracing the edges of the walls I often selected.


This level of editing is where I started to find issues that required more effort.
Most of the images had noise in them due to the level of shadow recovery necessary, even with HDR. In reality I should have taken more overexposed images to bring out shadow detail, but that ship had sailed and this was what I had. I decided to try out Lightroom’s AI noise reduction feature again because Adobe’s recently-released version 14.4 no longer needed to create a new DNG when noise reduction was applied. While the quality still couldn’t match DxO PureRAW, it had the advantage of reducing the number of images I had to deal with and saving some space. It’s not free in terms of storage, but it’s smaller than a full DNG. I found it good enough, especially if I applied a bit of sharpening to bring back some of the softened details.
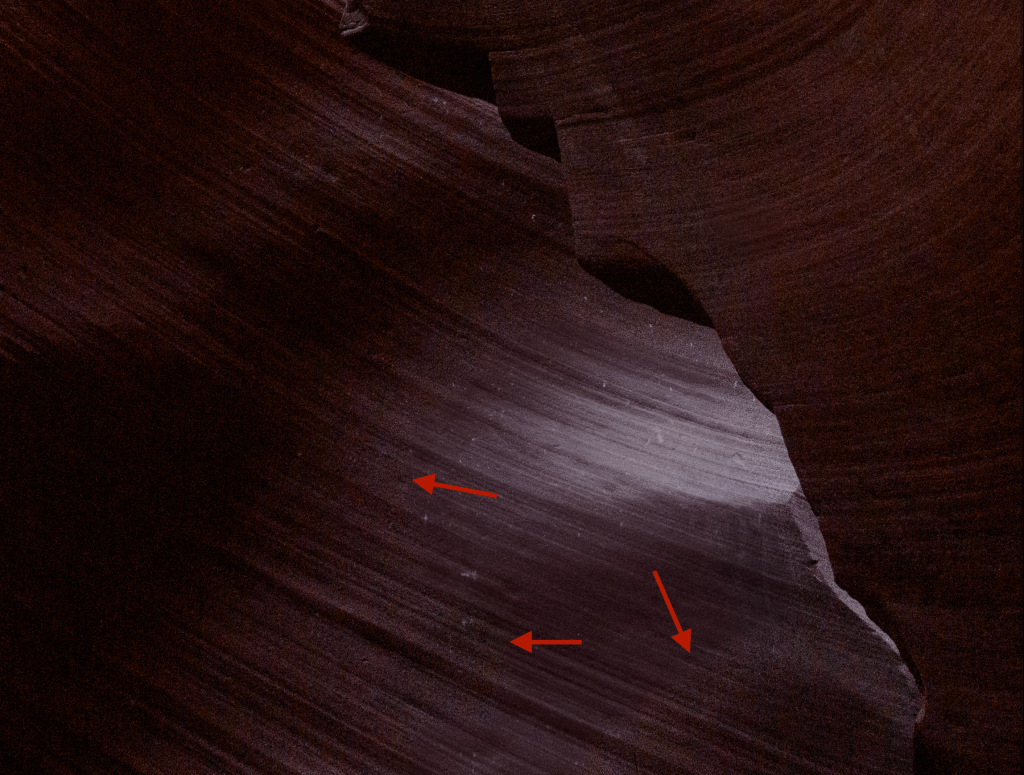

While doing this I noticed some weird banding and blotching in areas of the image that seemed random. I thought it was the noise reduction at first, but after turning it off I realized that it was part of the HDR image. Lightroom’s HDR processing would sometimes result in harsh areas that were significantly noisier than the surrounding areas for no apparent reason. The noisy areas crossed different textures in the image and wasn’t completely consistent. It happened to really dark areas but also less dark areas.
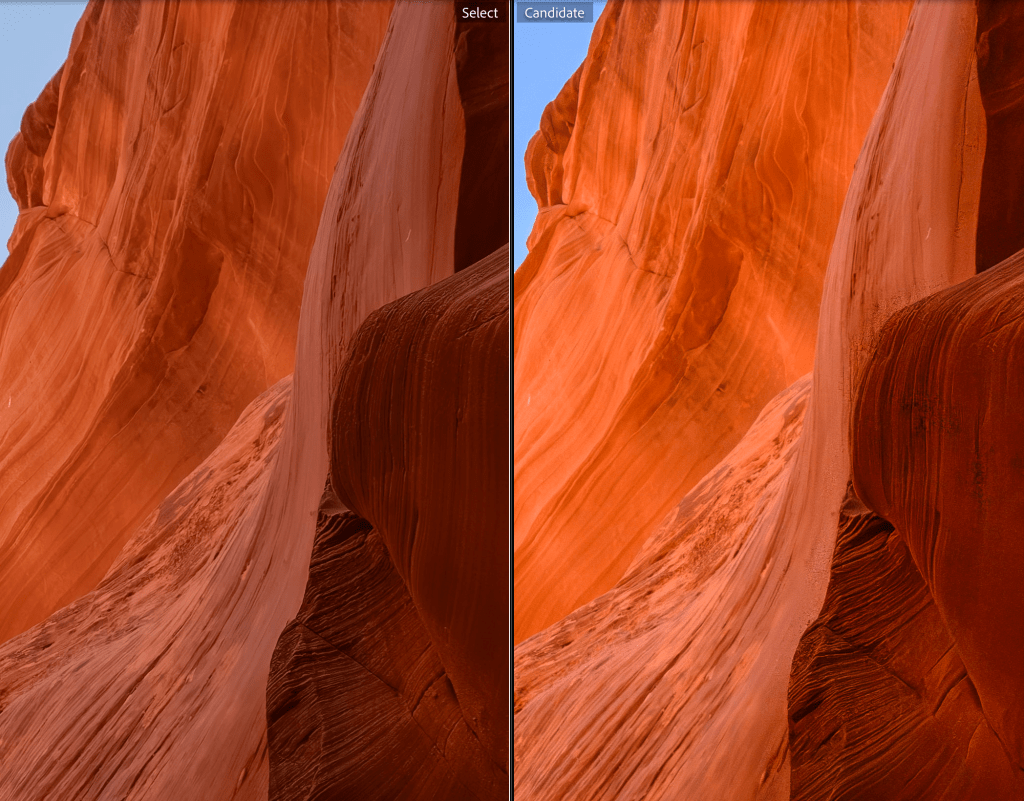
I thought that Lightroom was struggling with the 7 bracket stacks I was using, so I recreated some of those HDRs with only 3 images. In some cases it was better and I moved on, but there were others where the rough noise still persisted. For those I brought out my trusty pal DxO PureRAW, processed three images at +1, -1, and 0 stops exposed, and created an HDR out of that. Problem solved, but processing took a lot longer and I was left with 3 new noise-reduced images and an HDR each time.
I even created a custom keyboard shortcut to process the selected images in PureRAW to improve my workflow. I chose ctrl-option-command-r 🙂 The PureRAW processed images reminded me how much higher-quality it is than Lightroom, but I didn’t want to redo any more images than I had to. The end result is a mix of images using Lightroom’s noise reduction, PureRAW’s noise reduction, and no noise reduction at all.
Once I had fixed the noise issue I continued editing, slowly whittling down the images, removing duplicates, and skipping images that just didn’t inspire me anymore. I converted some to black and white and edited them further to enhance their contrast and mood. Six weeks later I had enough images to share, probably too many.
Now I have the fun job of purging the images that I no longer need. At one point my folder of 2025 RAW files took up nearly 700 GB and included about 18,000 images. I have the space, but it’s a waste and a ridiculous amount of stuff to scroll through and interact with. I’ll slowly meander through it and drop the stuff I don’t need so I can fill it up with photos from my next great adventure 🙂
