
I started using Smart Previews earlier this year as a way to save space on my MacBook Air while having access to more photos than I ever had before. That was a good move for me, but generating standard previews and plugging in an external drive for certain types of editing could be a bit better. I’ve made a couple adjustments that have improved my workflow even more.
Embedded Previews
Even when shooting in RAW mode, every camera creates a JPEG preview that is used for image review on the camera. Some manufacturers even create 100% resolution previews that are embedded in the RAW files. Lightroom can extract these instead of generating its own, which significantly speeds up the import process while also providing full resolution previews. You’re limited to the resolution and quality settings generated by the camera but preview generation is nearly instant because it’s just a file copy.
When I switched to Smart Previews, the import process lengthened because Lightroom had to generate both a Smart Preview and a standard one. By using embedded previews, Lightroom only generates Smart Previews, which are pretty fast.
This works great for my Nikons because they include full-resolution previews in their RAW files. My Sony does not, but they are usually large enough for me to get a basic idea of focus. Once I’ve rejected the ones that are really bad I can either generate full-size standard previews for them or look at specific photos in develop mode with the external drive attached.
Overall this is a pretty good improvement to my workflow.
OWC Envoy Express
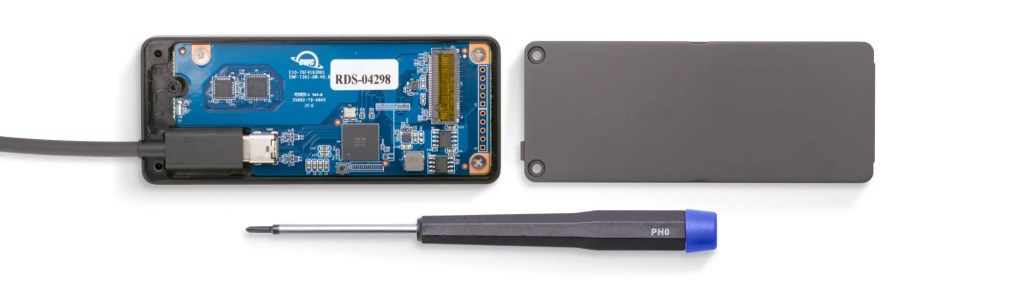
I was initially storing my RAW files on an external SATA SSD in a USB 3.0 enclosure. It held a 2.5″ SSD from one of my older machines and it was relatively portable, being a bit larger than a deck of cards. It certainly was faster than my external RAID drive, but it wasn’t in the ballpark compared with my MacBook Air’s internal SSD. The drive achieved about 350 MB/s throughput versus my MacBook Air’s 2,000 – 2,500 MB/s. To remedy this I bought an OWC Envoy Express, a small Thunderbolt enclosure for M.2 NVMe SSDs. This enclosure is also bus-powered and it’s combination of a Thunderbolt connection and an NVMe SSD provides around 1,500 MB/s throughput. NVMe SSDs are also small, about the size of a RAM module, so the enclosure is smaller than my 2.5″ SSD was.
While it isn’t quite as fast as my internal SSD, it is about 3x faster than my USB enclosure. For under $200 I was able to get the enclosure and a 1 TB Samsung 980. That has already provided plenty of storage for my images, allowing me to store nearly 500 GB of photos at various times. The max I could ever get on my MacBook Air without really getting creative was about 250 GB. While I still cull out a majority of the images I take, the extra space reduces the pressure. I don’t have to worry about not having enough space to install an application or download a large file. As a bonus I also use the drive for my RAW cache and increased it from 20 GB to 50 GB for improved performance.
So far it has worked very well and I haven’t noticed much lag when loading RAW files from it like I had with the 2.5″ drive. As a bonus, the Envoy Express comes with a sled that can be attached to the back of my screen for easy mounting. The sled uses a reusable and clean-to-remove adhesive that makes it easy to keep the drive out of the way when I’m using it. It looks a little awkward hitching a ride back there but it’s so easy that I keep it on all the time.
As much as the drive has helped my workflow, it does have a bit of a cost in terms of power usage. Regardless of whether it is idling, it seems to use 5 watts of power. For context, my entire MacBook Air is using about 7.5 watts as I write this. Having the Envoy Express connected shortens my Lightroom sessions into the 2 – 3 hour range. I’m not sure if it’s the Envoy Express, Thunderbolt protocol, or something with the 980 itself. The 980 has very low idle power usage but I’m not seeing it for some reason. It’s not the worst thing, two hours of heavy RAW editing is plenty, and I can unmount the drive and use Smart Previews if I need to conserve power.

2 Replies to “A Few More Modifications to my Lightroom Workflow”