

Last Christmas… I assembled the 9,000 piece Lego Titanic. It hung out in my closet for half a year while we found a suitable stand and case to put it on. Since then it’s been in the dining room looking great in the daytime, but just so… dark in the evenings. It was time to light it up.
I discovered lighting kits soon after I finished it last year but decided to wait. They cost over $200 and I really wasn’t in the mood to disassemble my 18 hour project so quickly. To make the price a bit more palatable and to ensure I had time to assemble it, I planned to pick up a lighting kit around Thanksgiving. I was hoping to take advantage of a Black Friday sale and planned to use my holiday time off to do the building.
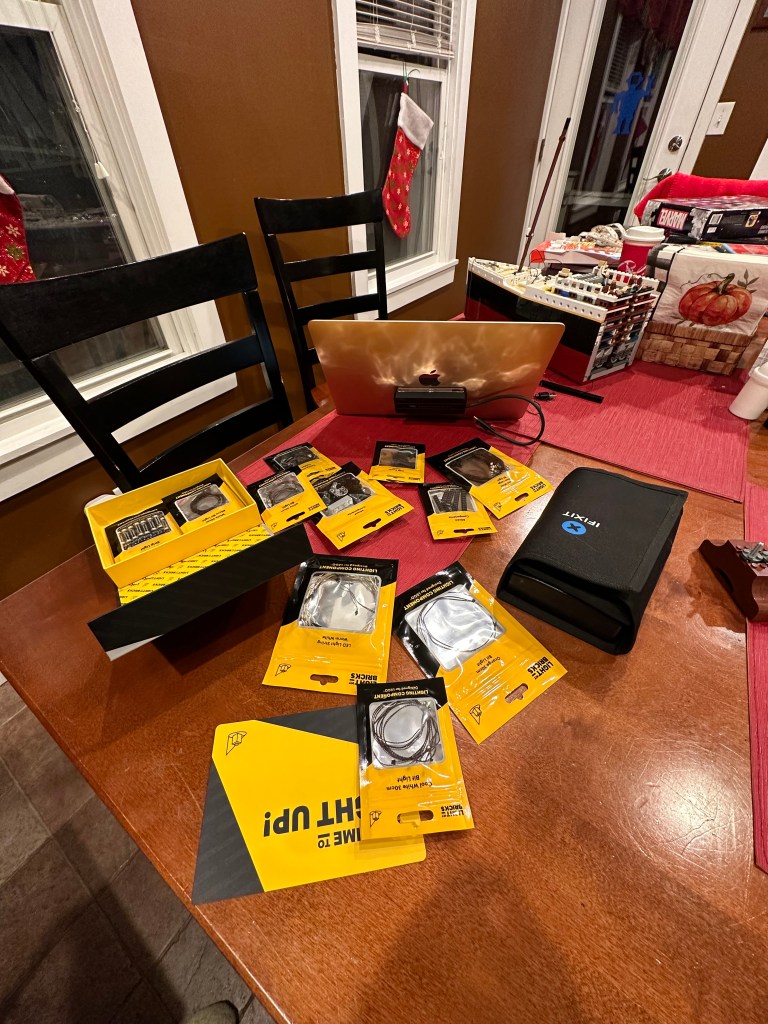


I lucked out and scored a 25% discount on the kit from Light My Bricks that shaved $55 off the $220 price tag. The Light My Bricks kit is on the higher end, but I chose it specifically because it’s more realistic than the cheaper kits I’ve seen on the market. For instance, many of the cheaper kits do not light the port holes in the bow or stern of the ship. They also illuminate the smoke stacks internally instead of using spotlights. The Titanic definitely did not have glowing smokestacks.
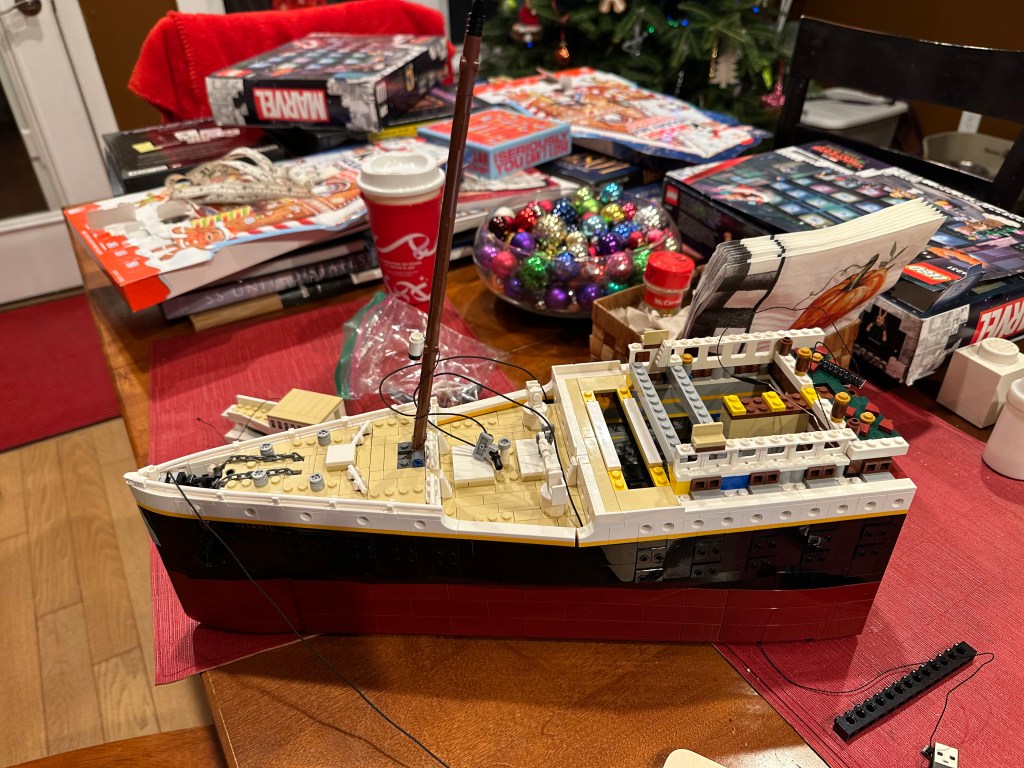

I’m very happy with the kit. It shipped fast and was well organized. It came in a high-quality box with a magnetic flap and all of the pieces were sorted into individual resealable bags. The PDF instructions were clear and the pieces were mostly easy to connect together. Disassembling any Lego is a bit challenging, and the scale of the Titanic meant that I needed a few ziplock bags and a box for extra pieces. In some instances I had to peel the entire outer structure off in order to put the lighting in.

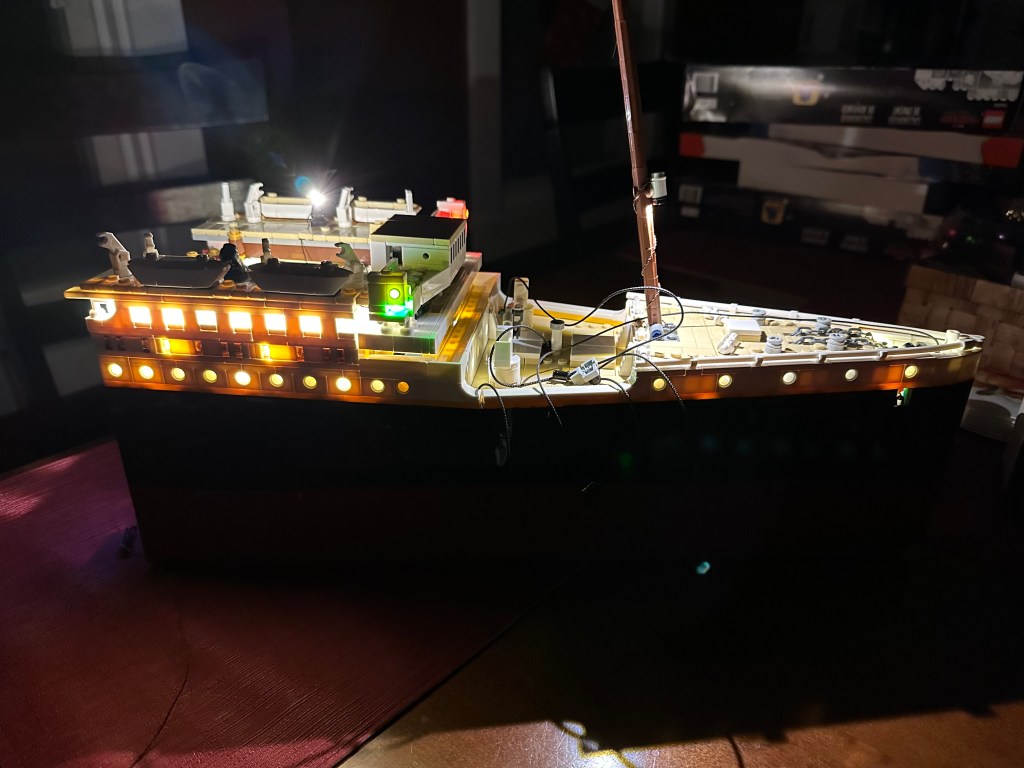
I estimate that it took about 10 hours to install the entire kit, but overall it went well. As I read the instructions I actually discovered that I had originally assembled a few minor pieces backwards! I only made one mistake in my build, pinching a spotlight wire and breaking it, but I was able to replace it with a spare one that happened to be in the kit. Overall I think it looks pretty fantastic, though closer inspection will reveal some areas that aren’t so tight anymore. Those wires have to go somewhere!
It’s all set up now and will join the rest of our house lights on their nightly routine – on at 5 PM and off at 11. It’ll be like having a Christmas Tree all year long.

Amazing Jason, can’t wait to see it!
LikeLike