
I posted recently about taking tulip photos in my “studio” and experimenting with focus stacking to create images that put more of the subject in focus. I don’t have a camera that can automatically take a series of images that are easy to stack, so I’ve been trying to do it by manually adjusting the focus a tiny bit over a series of images. It’s been a lot more intensive than I expected and I haven’t had a situation where I didn’t need to do a lot of hand-editing. I’m hoping that a camera that can take a series of images with the exact same focus difference will be easier. In the interim, I’m getting quite a lot of experience editing in Photoshop.


The above image was made by manually stacking three images together. I got away with only three because there isn’t a lot of depth in this subject to create out-of-focus areas. That made it easier to blend the seams together and took much less time than my other stacks. The original image is very nice, but the focus stack makes the right two petals sharp and provides more detail on the stem.


This image was a lot more complicated. It has six major planes of focus, with graduations in between. It took 8 images and several layers in between to construct. I started by dropping them into Photoshop, aligning them, and having it automatically blend the layers into a final image, but it didn’t come out well. In many cases, sharply focused areas from one image were seemingly-randomly integrated into blurred areas of other images. I tried fixing it but got so fed up that I threw it away and did it manually.
I’ve spent at least three hours trying to blend this and it isn’t done yet. At this size it looks OK, but on further inspection there are a bunch of seams that need better blending, as well as some ghosting that needs painted out. I wasn’t paying full attention when I shot the originals and don’t have any images from this set that bring the first petal into sharp focus, limiting the maximum impact I can get. As you move the slider between the single image and the focus stack you’ll notice the shape of the tulip change a bit. This is because the size of the subject changed as the focus changed and I didn’t try to resize them to match each other.
This was very intensive edit so I decided to stop and ship it as it was. I’m keeping the Photoshop file around so that I can tweak it in the future. It looks fine small, but I wouldn’t print an 8×10 just yet.

Photoshop’s automation didn’t do a terrible job with this image, but I still needed to clean it up a fair amount. Adjusting one of Photoshop’s blend jobs can be frustrating because I have to dig through all of the layers trying to find what’s wrong, mask out the affected area on that layer, then mask in the detail I need from the layer below. Photoshop also occasionally modifies the original layers with patches designed to make the tones transition smoothly, but they often stick out and have to be manually addressed. I might have spent the same time on it if I had just done it manually.
From an output perspective, this one came out very well. The stacking allows both the front and back leaves to be in focus along with the tulip. I’m really proud of this one and I really love the way it came out. The red tulip looks great on a black background, the lighting is gentle, and the curly leaf up the side of the flower is interesting. The leaves also have a great texture to them. There are a couple blend lines on the right leaf that I need to redo, but otherwise this is great.


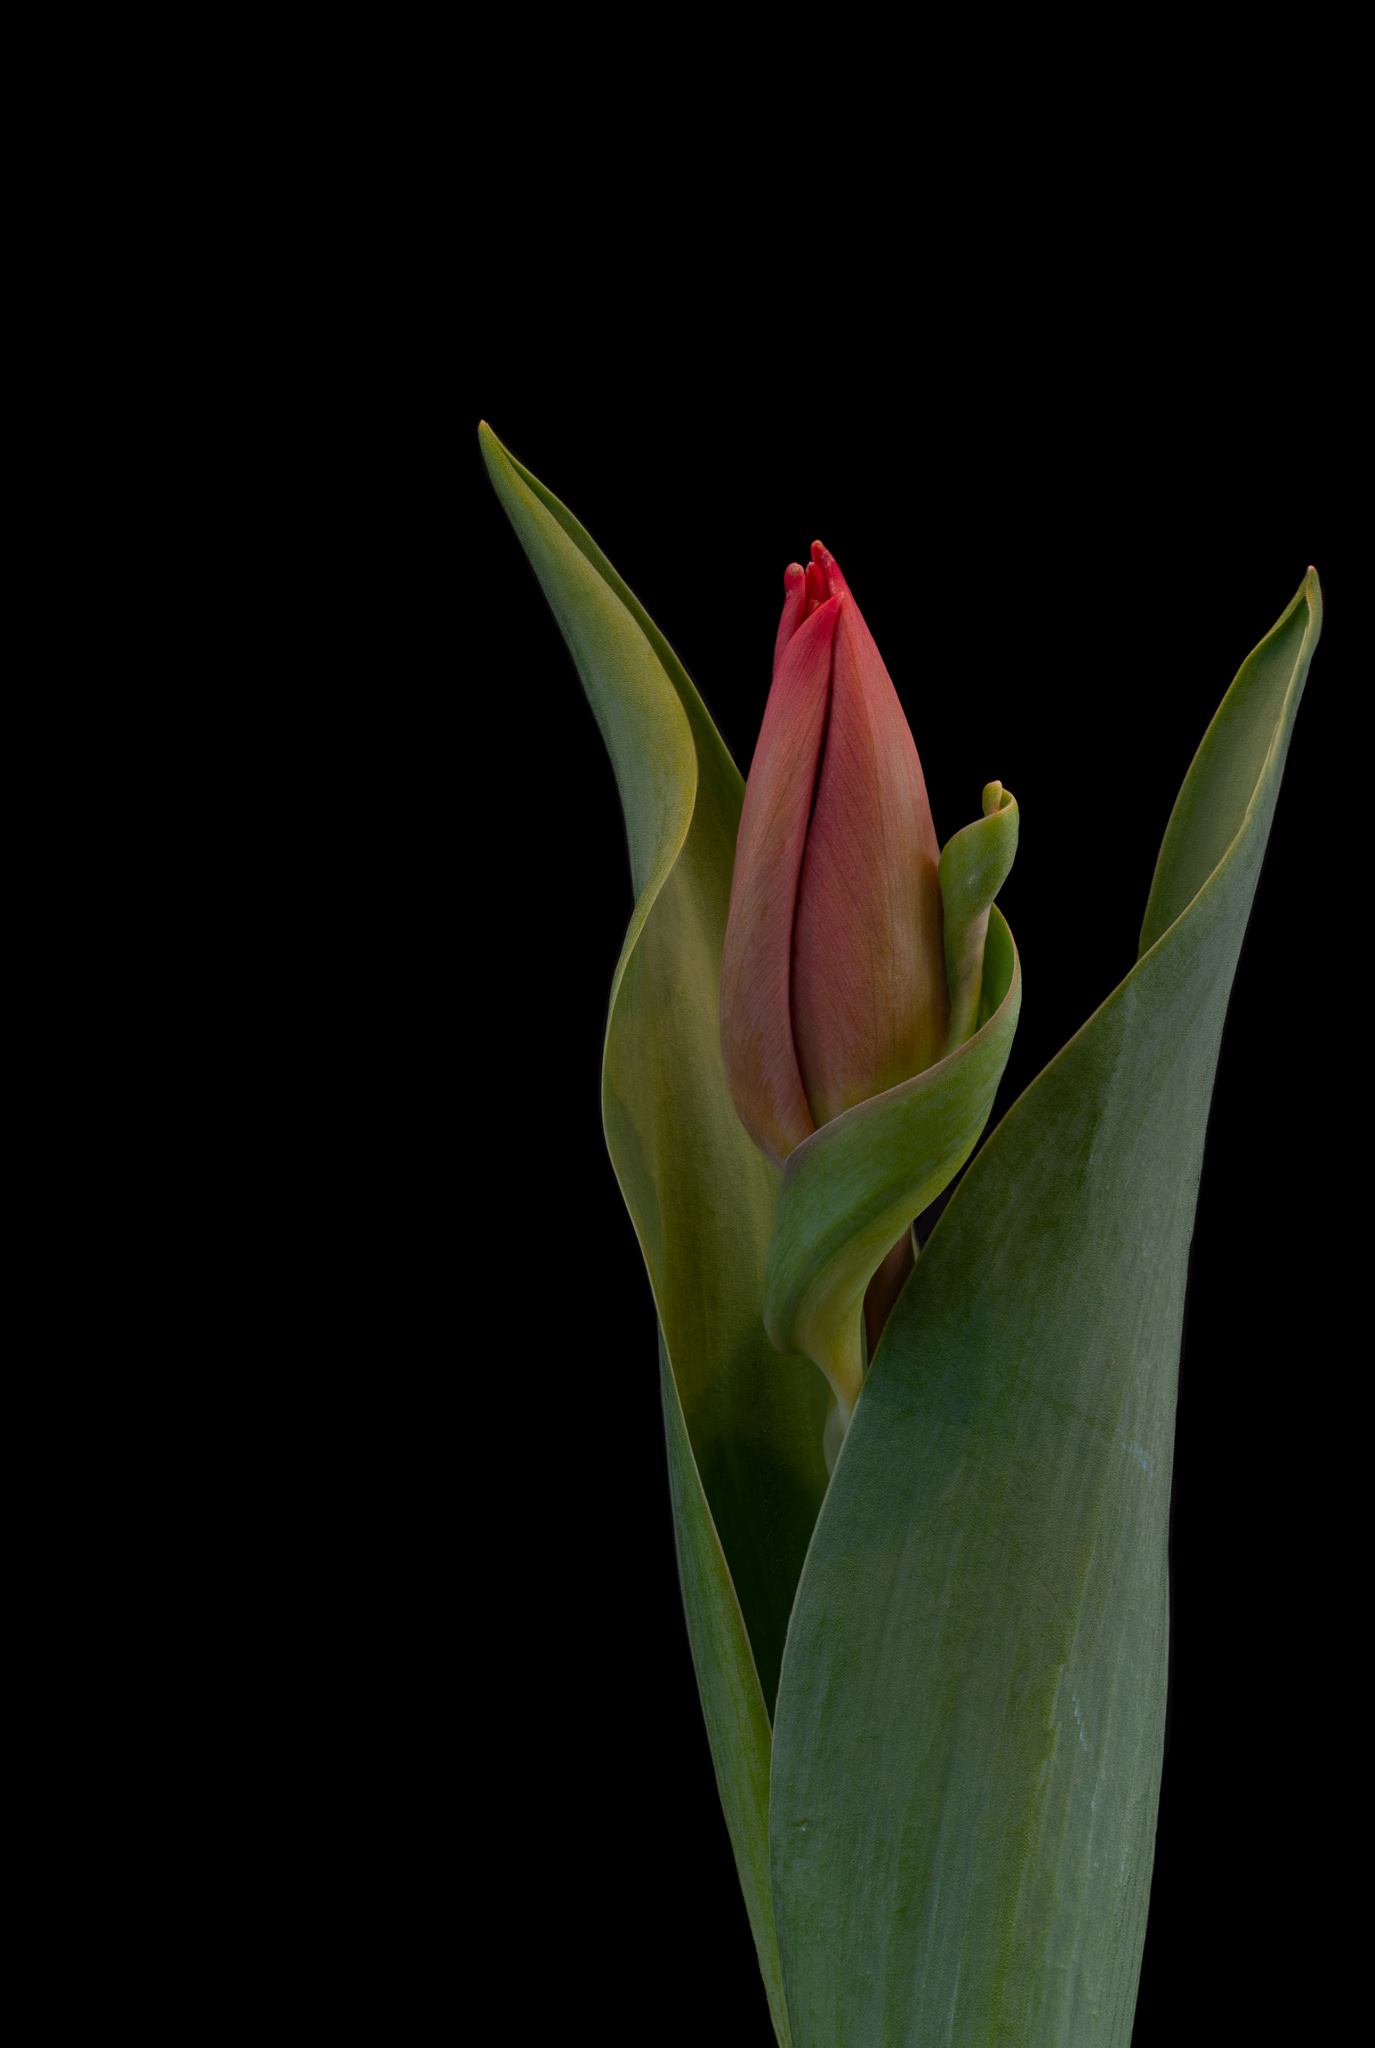
The image above is completely manual. I tried a bunch of different things with Photoshop – aligning layers and blending with seamless tones and colors, not aligning layers, not using seamless tones and colors – and it all came out terrible. I started over and blended this by hand. I’ve learned a lot from my other images and this didn’t take as much time as I thought. I successfully took care of most blend lines through my newly-acquired Photoshop skills. It also didn’t hurt that I intentionally shot more images with smaller differences in focus between them.
I really like the image in general, even the single one. The tulip is nice and large and the curvy edge of the bottom leaf leads in to the background. The lighting worked out really well, providing a bit of backlight, highlights on the leaves, and soft shadows on the other side of the flower. It’s done in the studio but has the natural look of the sun. Stacking manually wasn’t as much work as correcting Photoshop’s mistakes would have been
The Limits of Photoshop


I was really excited to start playing with focus stacking. I thought I could just drop this stuff into Photoshop, align the layers, and let it blend them for me. In a few minutes I could have an image that was sharp from foreground to background! The reality was far from it – I had to heavily modify the two images I let Photoshop create for me and I did the other two completely by hand. Each image has ranged from one to three hours of work.
The comparison above shows just how messed up Photoshop’s results can be. On the left I have my manually stacked image from earlier in the post. It took an hour to create by hand. On the right is what Photoshop tried to generate for me. It took under a minute, but there are ghosts all over the place, random areas where it chose to use the blurriest images and that weird bright spot that isn’t in any of the source images. It would take me more than an hour to fix all of that, which is why I did it by hand.
I’ve searched the web and I can’t find much about this kind of result, but almost all of my Photoshop auto blends look like this. I hope it’s because I just can’t accurately split the focus differences into small enough chunks. This image divided the focus (or most of it – I never got a shot with a crisp background leaf) across 8 images. That doesn’t leave a lot of overlap to help Photoshop understand how the focus is shifting from foreground to background. Cameras that can focus stack can take up to 300 images, resulting in source files that overlap quite a bit in terms of focused area. Even 50 or 100 images should result in a much better result.
I could buy a focus rail to provide fine control over focus changes, but I’m confident that my next camera will include focus stacking so I’m going to wait. Given the rumors, it shouldn’t be more than a couple of months.
Despite some of these being still a bit work-in-progress, I’m proud of what I’ve learned. I’ve done more in Photoshop than I’ve done in over a decade and become really comfortable with masks, which is something I never used in the past. My brushing skills have improved from basically nothing and I feel confident that I can blend two areas of focus together if I put my mind to it. I’ve learned a few ways to capture source images that stack better too: use a tripod, vary the focus as little as possible, take more than 10 images, and if using flash, don’t use TTL unless you want to deal with differing exposures across the images!
When I finally do get a new camera, I’m confident that focus stacking will be one of the things I try out.
