

Sally has always wanted photos of the boys at the beach. Not beach day photos, but real portraits. So we planned a day and went to the beach last week. It didn’t turn out the way we thought it would and it was stressful at times, but we ended up with some great photos and I improved my technique a lot. This is what I learned.
Early Morning Means Early Morning
Natural light is best in the early morning or sunset because it is the softest. Any time in between casts harsh shadows and is often so bright that it blows out highlights and restricts you to small apertures that create sharp backgrounds – the opposite of what you want for portraits. I “knew” this, so we planned to go to the beach in the morning.
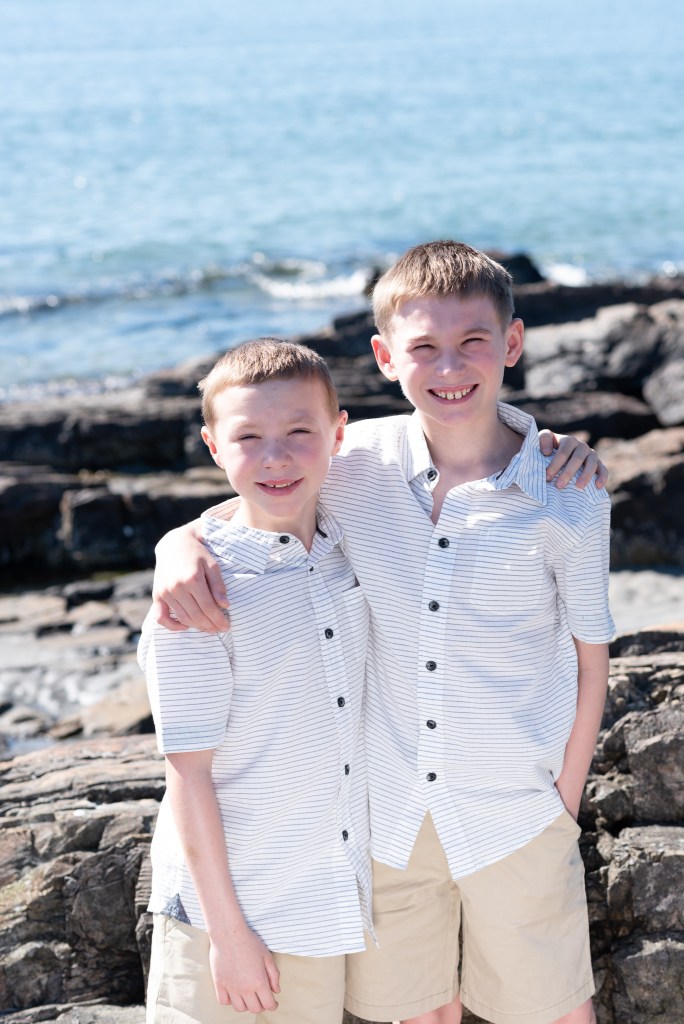
We headed out at 7:30 AM and the sun was already up in the sky. It was already too late, out photos would be ruined. Early morning really means sunrise (an hour before, actually) when the sun is not yet in the sky. We tried taking photos despite this and it was terrible. There was no shade available (common on a beach) and the boys had no choice but to face the sun to get the beach in the background. It was a disaster – they could barely open their eyes, they were uncomfortable, and we kept yelling at them to smile and stop complaining. The pictures were terrible too, with blown out highlights everywhere, extremely harsh shadows, and reflections all over their faces.

We were disappointed and annoyed but resolved to come back at sunset and try again. This time we prepared properly.
Stay in the Shadows
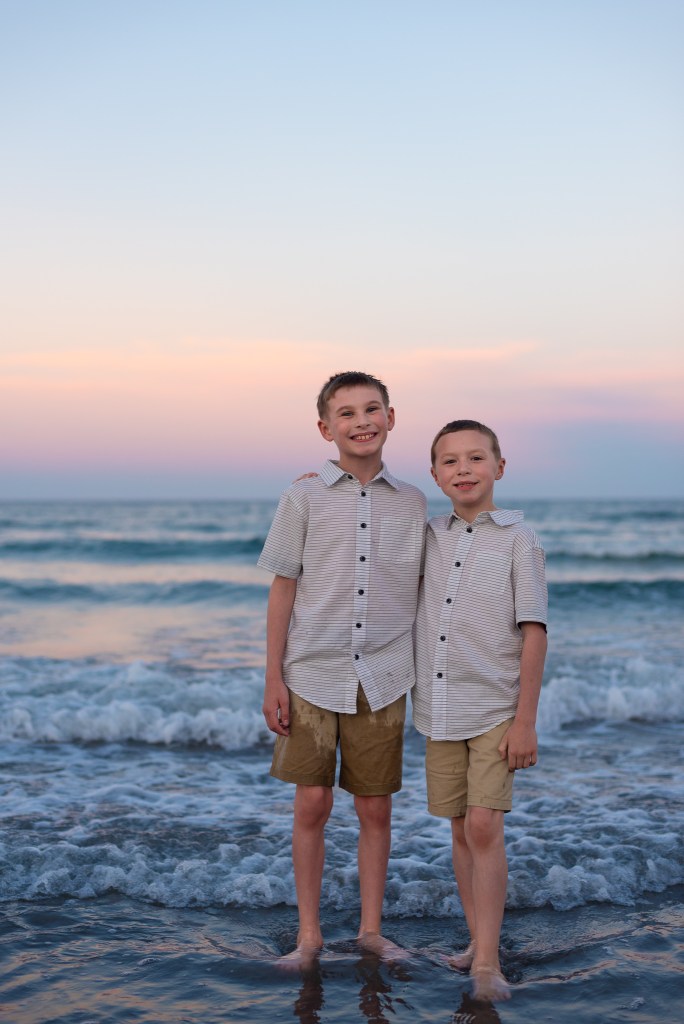
We thought sunset would fix all of our issues. It would make a beautiful background and everything would be wonderful. Except the sun wasn’t setting behind the ocean, it was setting in front of it… and shining directly in the boys’ eyes. Damn.

Luckily the beach is about five feet below the road and there were houses that blocked the sun as it set. The lower the sun went, the more shadow we had on the beach. After a few failed attempts and burning the boys’ retinas out, we found some spots in the shadows to take photos. It worked great, except that the exposure wasn’t quite correct – either the boys were too dark or the background was too bright.
When in Shadow You Must Use Flash
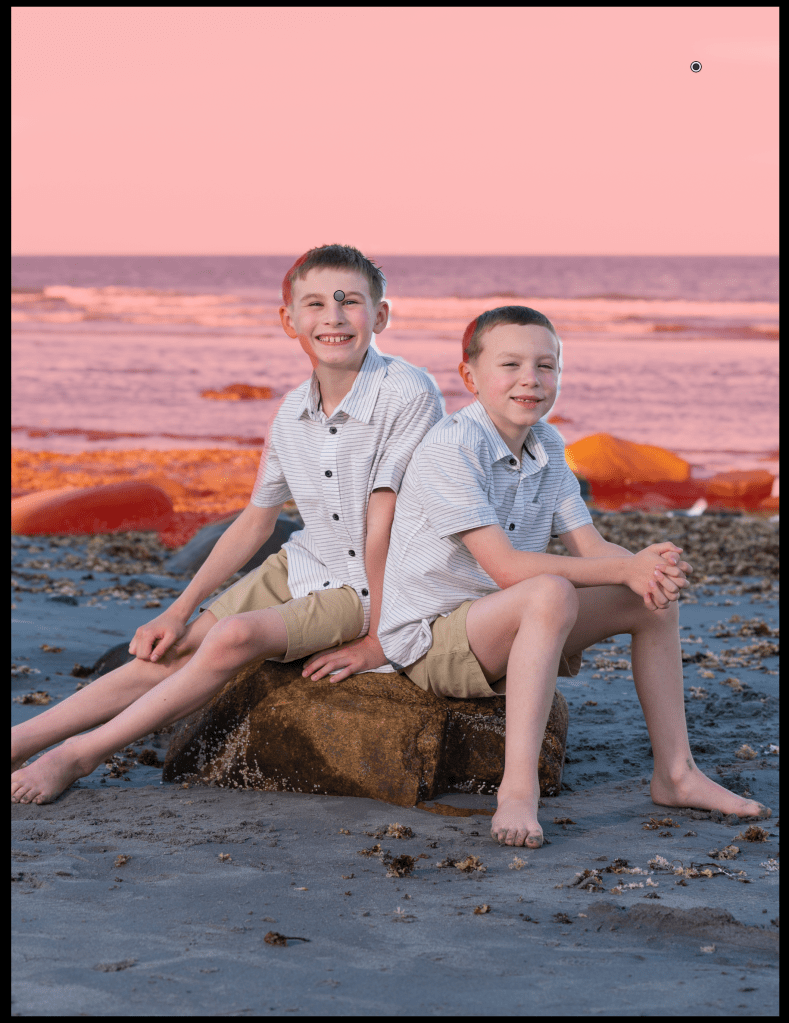
Flash and I have a very patch history. I’m really bad with it. I can’t estimate when I need it, I don’t know what settings to use, and I can’t picture what it will look like in my head. But the only way that I could make these images work was to add some light to the boys so I could capture the bright background of the sand and water.
Luckily I had been practicing with flash for all of my flower photos recently and even though I didn’t feel confident, I at least felt a little better that I might be able to get it working after some trial and error. I knew I’d have to use off-camera flash so I put it in remote mode, attached a recently-purchased portable softbox, and told Sally where to stand. I put the flash in manual mode at 50% power as recommended by a tutorial I read and made a test shot. It wasn’t great so I increased the power and took several more until I had it at 100% power and figured out where Sally should stand. She made a great assistant, by the way.

I used this strategy for the rest of the images and it worked well. Every so often I had Sally move closer, further way, or move to a different side so we could get a variety of lighting. I’m happy to say that most images came out without hard shadows or that tell-tale flash shininess.
The images looked good on my camera but once I got them onto my Mac I realized that the ocean background was still pretty bright in comparison to the boys. Editing would be necessary.
Brushing and Dynamic Range to the Rescue
I typically don’t edit my photos very much during post production. I might tweak the overall exposure, white balance, and black level, or apply a preset, but that’s about it. I rarely use brushes to dodge and burn specific parts of an image to get a specific look, but had been practicing it a bit to make pure black backgrounds for my tulip photos.
I’m glad I had some practice because I really needed it here. I needed to brighten the boys a bit while darkening the beach in the background. I also needed to pull some of the colors out of the sky to replicate what the light looked like. I couldn’t change the global exposure settings to do this and had to brush in the changes by hand.
I used a combination of settings for Lightroom’s brushes including various feathers, densities, flow rates, and auto masking to brush the changes in as needed. I usually used one brush to mask off the background and drop the exposure and highlights. I used a separate brush to mask off the boys to increase exposure and shadows. I had to be careful not to overdo it otherwise the boys would look like they were in front of a fake backdrop. Depending on how close the portrait was, I also used a brush to whiten teeth.
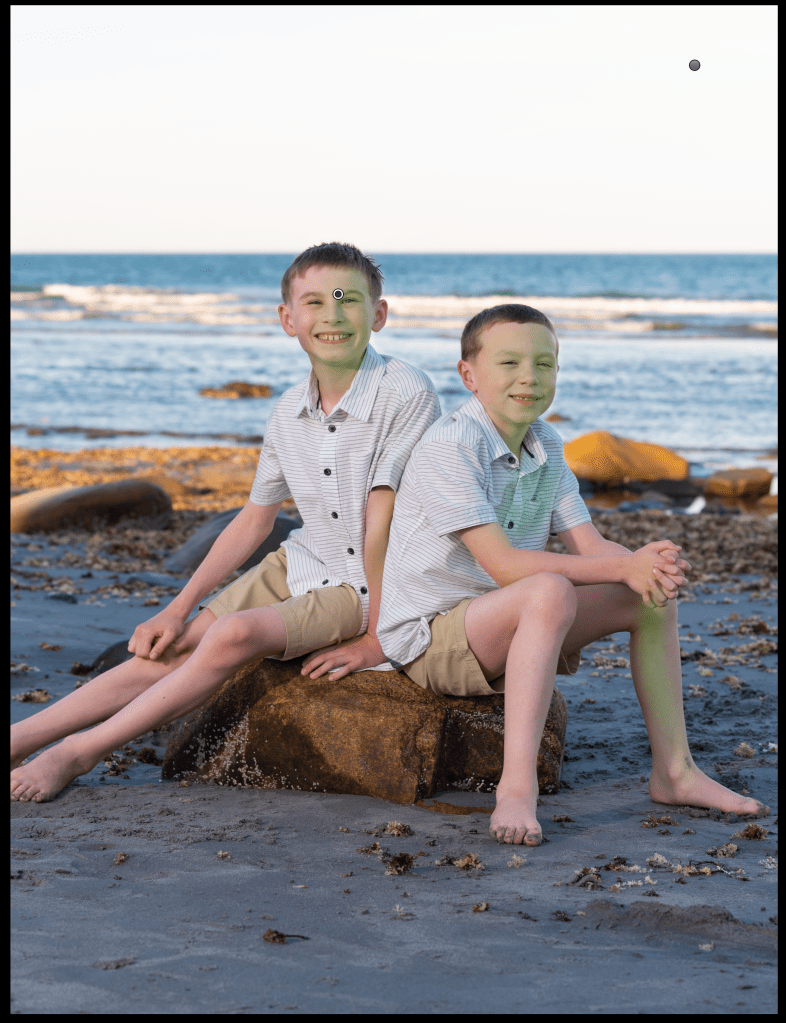
I combined this with a white balance correction (sometimes deliberately more yellow and purple), a vibrance boost, and a saturation boost to the entire image. I also used the healing brush to remove a big scab that Adam had on his knee. He wasn’t pleased that I altered reality, but it removed a significant distraction.
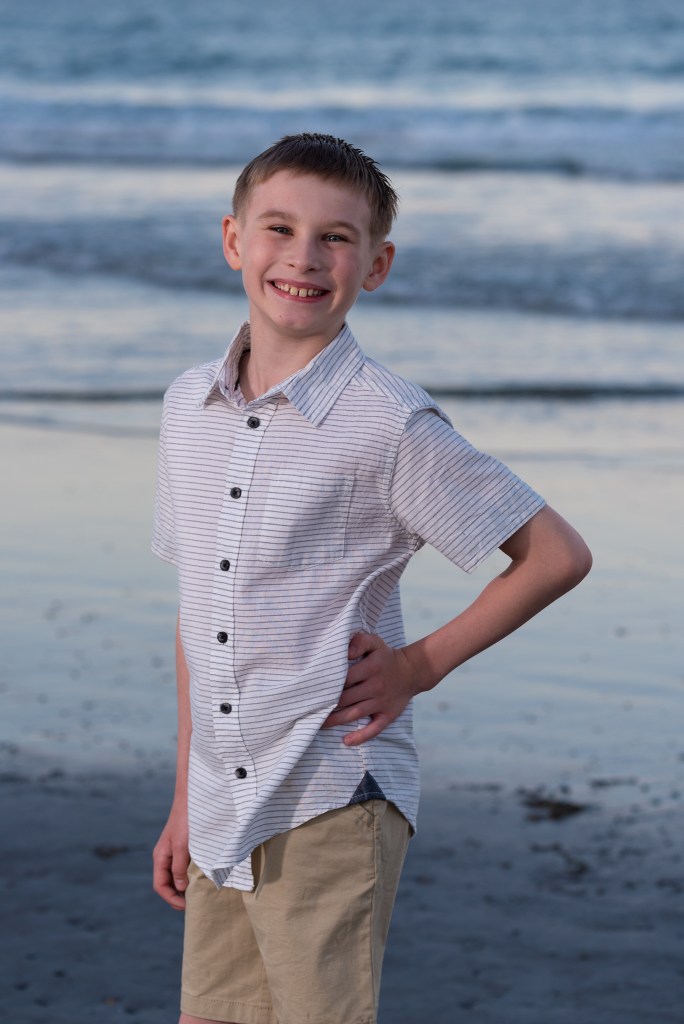
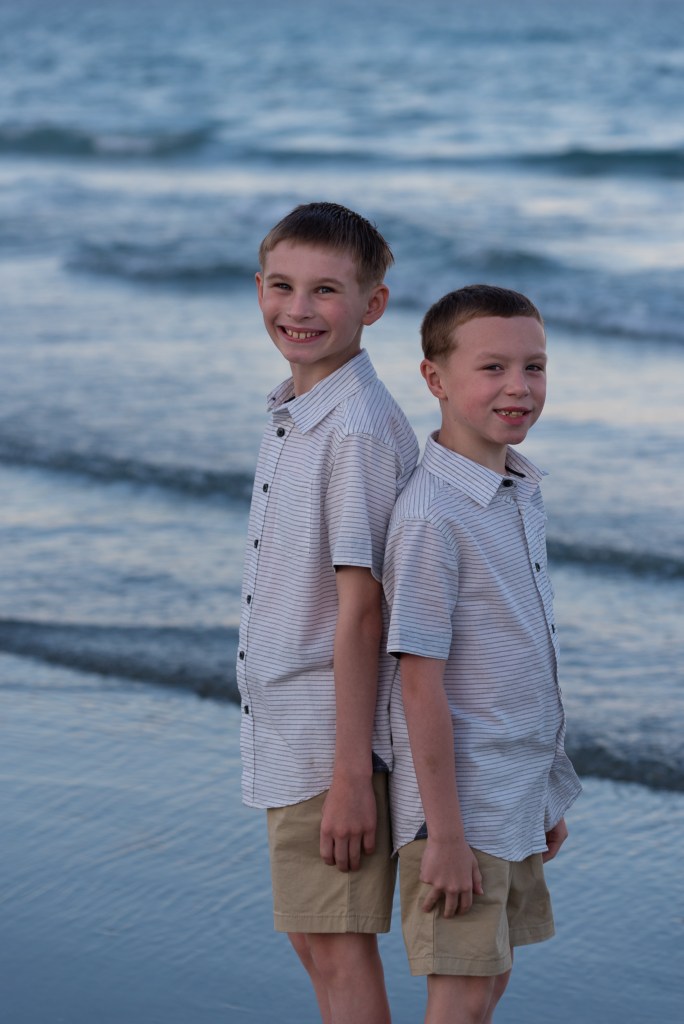
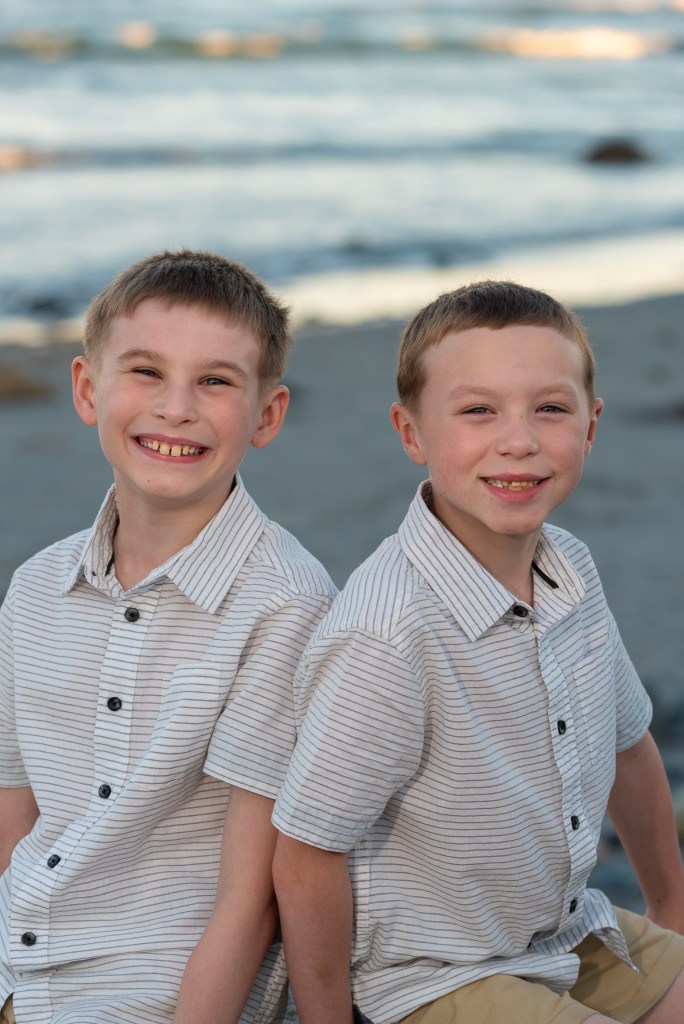
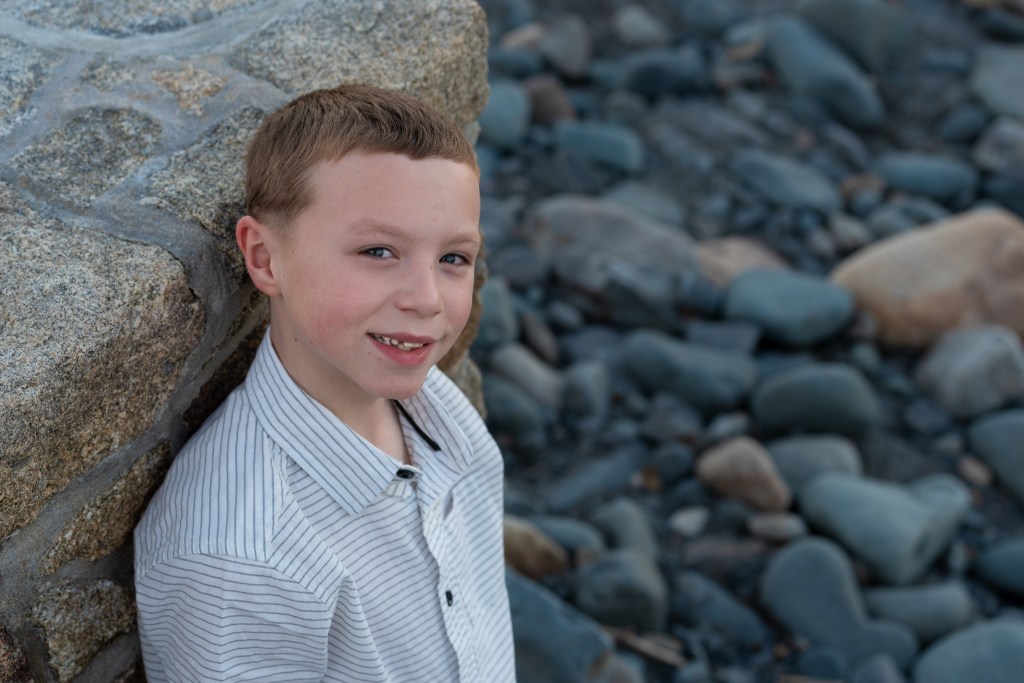
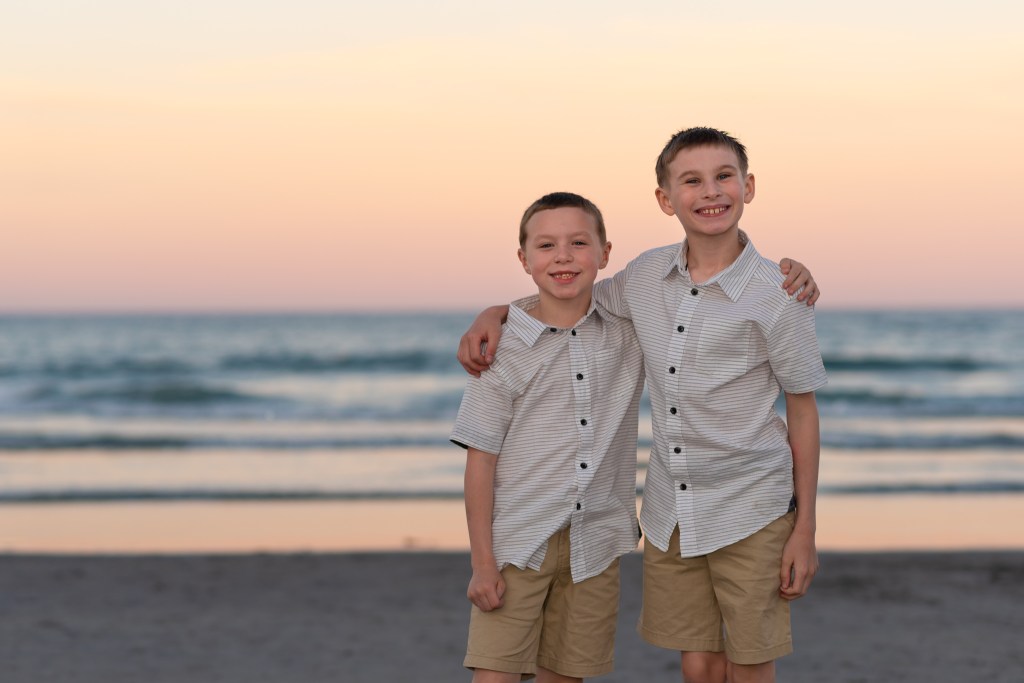
It took me a fair amount of editing to get the images balanced the way I wanted and they aren’t perfect, but they are pretty good. Here are some of the final images.


Learnings for Next Time
While overall I’m extremely satisfied with the images themselves, I learned a lot about what I could do better next time:
- Skip the AM hours unless we are literally going at sunset
- Bring the flash a bit closer to the subject(s) so that I don’t need to do as much brightening in post
- Have my kids brush their teeth before their photo shoot so I don’t need to whiten teeth as much
- Pick a beach where the sun will set behind the water, not in front of it
