
I bought a Sigma 150-600mm super zoom four years ago so that I could take photos of the deer and birds in my back yard. It’s definitely served its purpose and allowed me to capture the animals that we are fortunate to have, but the results have been of a far lower quality than I like. Many of the images are grainy, lack detail, and feel dull. My first excuse could be that it’s the variable aperture, third-party zoom lens I’m using, and that a Nikon 200-500mm f/5.6 would magically produce better photos for twice what I paid. I could also blame my D750 for having only 24 megapixels, which simply can’t resolve the level of detail this lens can produce. Neither of those things are actually the problem. The problem is me and my photography technique. For animals, it sucks.
I’ve been particularly focused on birds this year since they are relatively abundant. My early photos were more snapshot-like in nature: the birds were small in the frame, they weren’t doing anything interesting, and they weren’t in sharp focus. I was happy to capture any bird in an image and didn’t take time to try to make the image good. After much experimenting, reading, and YouTube-watching, I’ve begun to improve my technique by doing the following:
- Using a higher shutter speed, at least 1/1250, to significantly reduce camera shake from my 600mm lens. Even though my lens is stabilized, I don’t have the most steady hand, making the 1/focal length rule a bit difficult.
- Stopping down my lens to f/8 to make the images crisp. It’s amazing what less than one stop will do to improve the overall sharpness of an image.
- Using Auto ISO to get correct exposure at high shutter speeds and small apertures. This can create noisy photos, but they are better than no photos and there are some solutions to that which I’ll discuss separately.
- Getting closer, which often means trying to move slowly and quietly or simply staying in an area waiting for a bird to land. This makes the bird larger in the frame and reduces the chance of haze. A 600mm lens can bring far away subjects closer, but it also brings with it light oddities shining through the air which significantly reduce detail and make cropping useless.
- Using continuous autofocus to keep the bird in focus as it moves around. I use group AF that focuses with a central point but monitors adjacent points to keep the subject in focus if it starts moving before I pan the camera.
- Focusing on the eye to get the most critical part of the bird in focus. Images of birds with sharp eyes can be quite breathtaking
- Taking bursts to increase the likelihood of crisp shots. I am not the most stable photographer and still introduce camera shake into my images even with high shutter speeds and image stabilization. I’m trying to improve myself, but burst mode has been extremely helpful. I may throw away 90% of the images, but I end up with keepers I’d otherwise never get. I use the same strategy for macro photography where depth of field is extremely thin and any movement puts the subject out of focus.
- Getting at eye-level with the bird to create a much smoother background and more flattering angles. This one is very difficult to do as birds are often up in trees, so I still take photos pointing upwards when I have no other choice. Sometimes I can get on a hill to get eye-ish level with a bird on a low branch and other times birds (particularly Robins) land on the grass and I can get them at eye-level. I used to take a lot of shots pointing down towards birds in the grass and I’ve largely stopped doing that since I can just bend down to get a much better angle.
- Practice, practice, practice and don’t be afraid to throw things away. I’ve taken thousands of bird images this year and kept probably 20% of them. Of that 20% I’ve only edited about 5% of them. Many of the images I took were not sharp and many were duplicates from continuous shooting. This doesn’t discourage me because storage is cheap and deletion is easy. I can take tons of images and try different things as I hone my skills. I don’t always want to be taking boat loads of pictures of the same thing but I’ll do it while I’m learning. For example, I used to have lots of images of Robins, many in similar positions. Now that I’m comfortable with them I only take a few at a time.
In addition to these technique changes I did buy another DSLR body to increase the focal length of my lenses and increase my continuous shooting speed, but the technique changes still apply. I’m still practicing but I’m starting to see improvements. I’m getting sharper images with birds larger in the frame on more flattering backgrounds.
The Images


These images are actually a bit of a cheat since I took them before I started honing my technique. They are from April and I took them on my crop-sensor D3200, a 24 MP budget camera I picked up on eBay for $200. While getting close was more luck than strategy I was able to get somewhat crisp images even with a crappy and slow autofocus system.
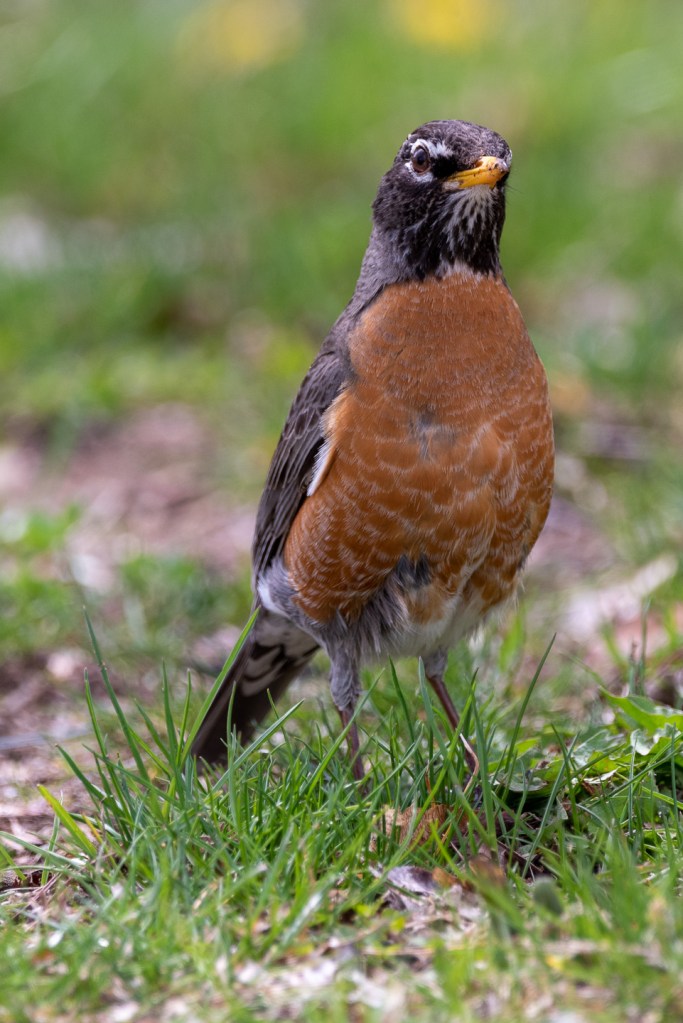

Above is an example where I actually tried to get close and get down to this Robin’s level to create a better background. I took this on my D750 with my 600mm lens. It certainly isn’t perfect but I’m proud of it because it is deliberate. I decided to make this image the way it came out by taking specific steps; it wasn’t dumb luck. While it’s eye isn’t quite tack sharp at 100% (right photo), it’s better than I achieved previously.


These two images are also from my D750. The first is one of my best bird images. The bird was up in a pretty tall tree but I was far enough away and zoomed in close enough to even the perspective out a bit. It isn’t perfect but the background is pleasingly blurred. The angle of the second bird isn’t the greatest but it’s still pretty sharp.


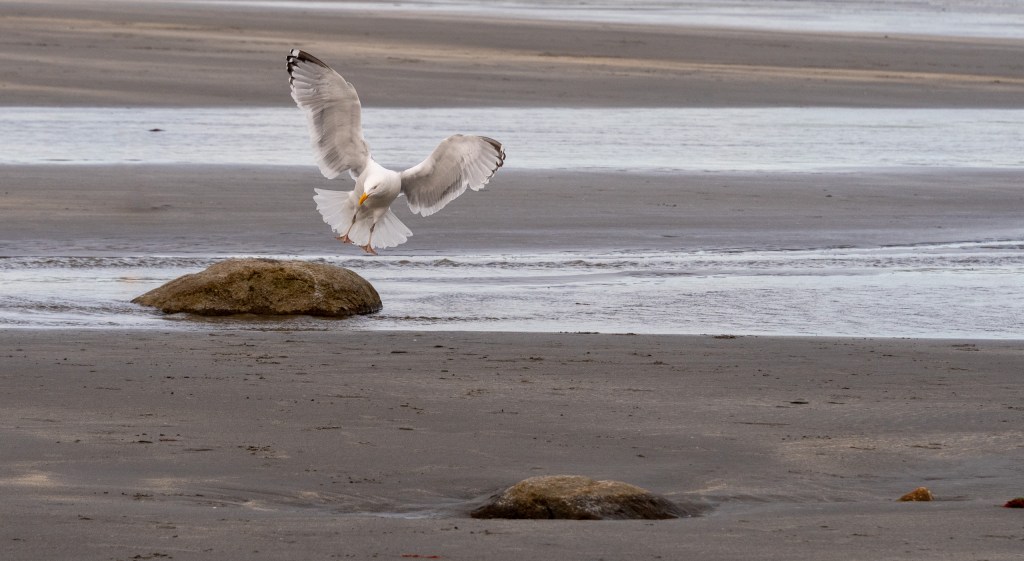

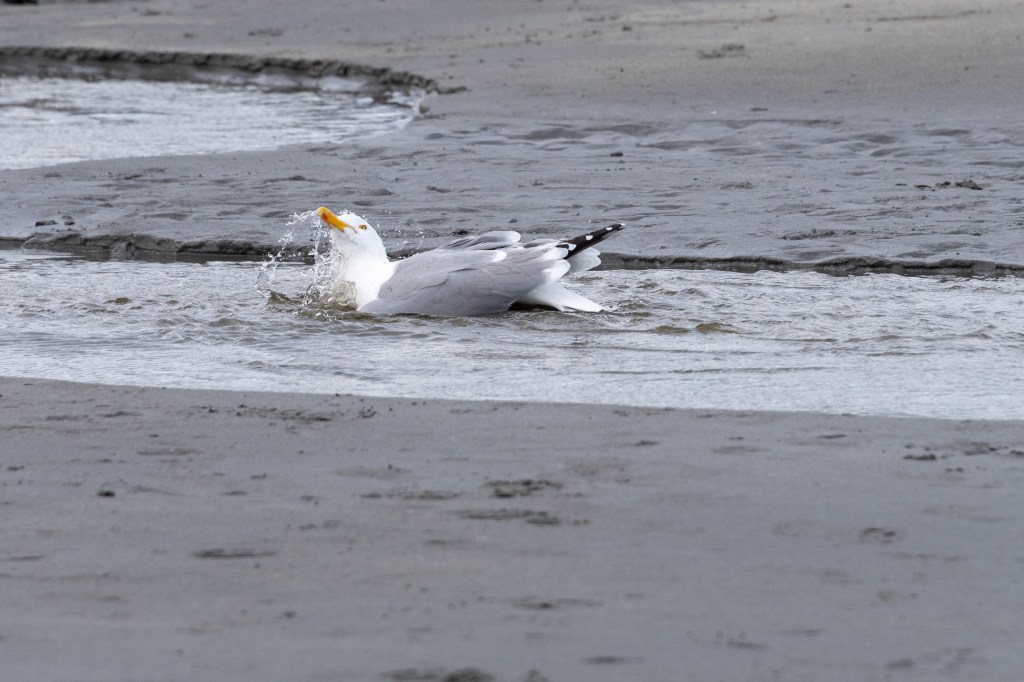


I took the above images while testing out my D500 to make sure its focus system worked correctly. They came out great! I used all of my skills – high shutter speed, high ISO, stopping down, continuous autofocus, bursts, and focusing on the eyes. I also got to try something new: panning. Seagulls are very abundant and like to fly close, which made it easier to make them larger in the frame. While it was challenging to track them in mid-air, I was able to focus on their eyes and get really sharp photos with persistence. These were all taken with my 28-300mm lens, which provides the equivalent of 450mm focal length while remaining light, short, and maneuverable.

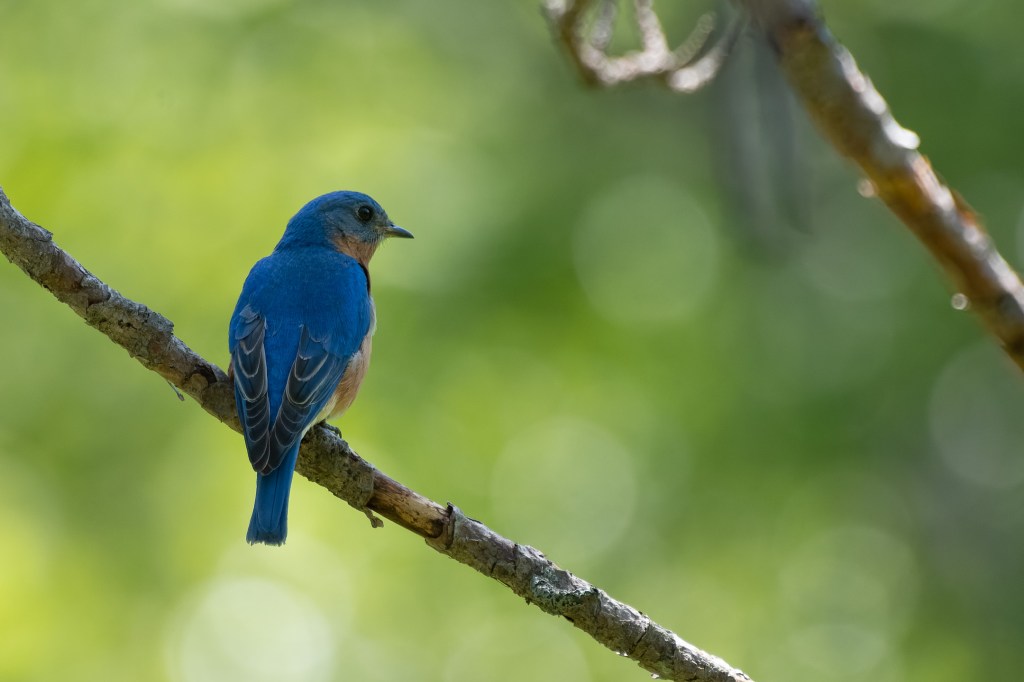


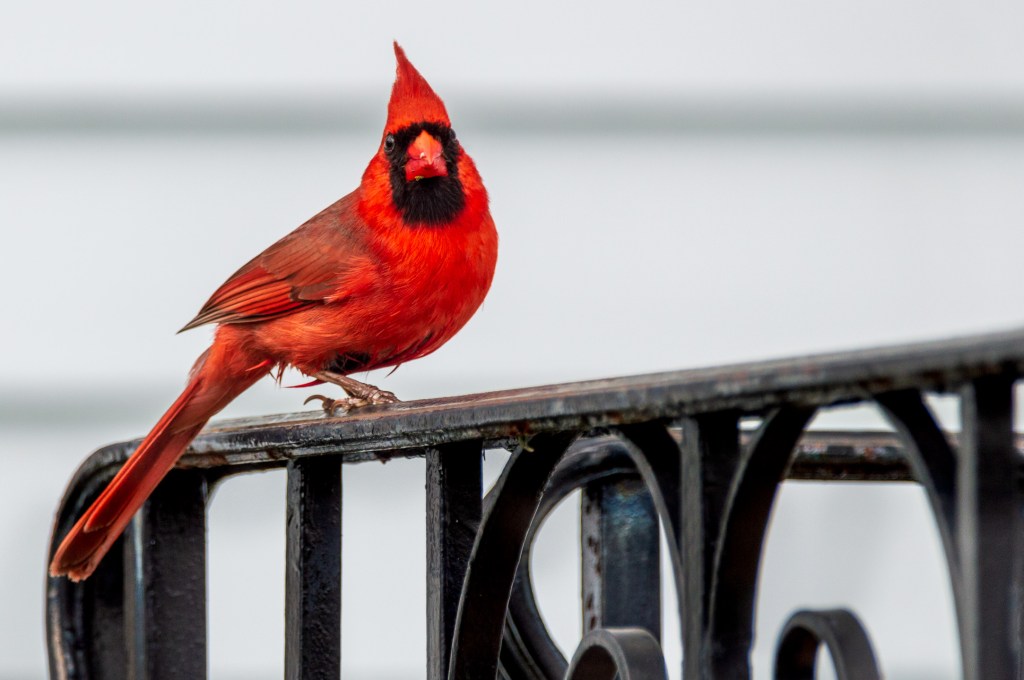
These are some of my most recent (May) and best images of birds in their element with blurred backgrounds. There is even some bokeh! I’m pretty close and the angle is pretty good, though not perfect. There are some unwanted elements in the background of some of the images, but again, I’m by no means a master of bird images and have plenty of room to improve. That said, I’m really proud of these at the moment.
What Next?
I’m going to continue refining my technique, trying to find birds that are different than the ones that I’ve seen so far. I’d like to get some images of larger birds, maybe some ducks at sunset, so I’m going to visit the Great Bay National Wildlife Refuge. I’ll probably visit some local ponds as well. I’ve spent this entire article discussing birds, but we also have deer in our yard. I’m excited to try my new techniques on them when they start coming out again. Getting close without scaring them away will be difficult, but I’m up for the challenge.

2 Replies to “Improving My Bird Photos”