
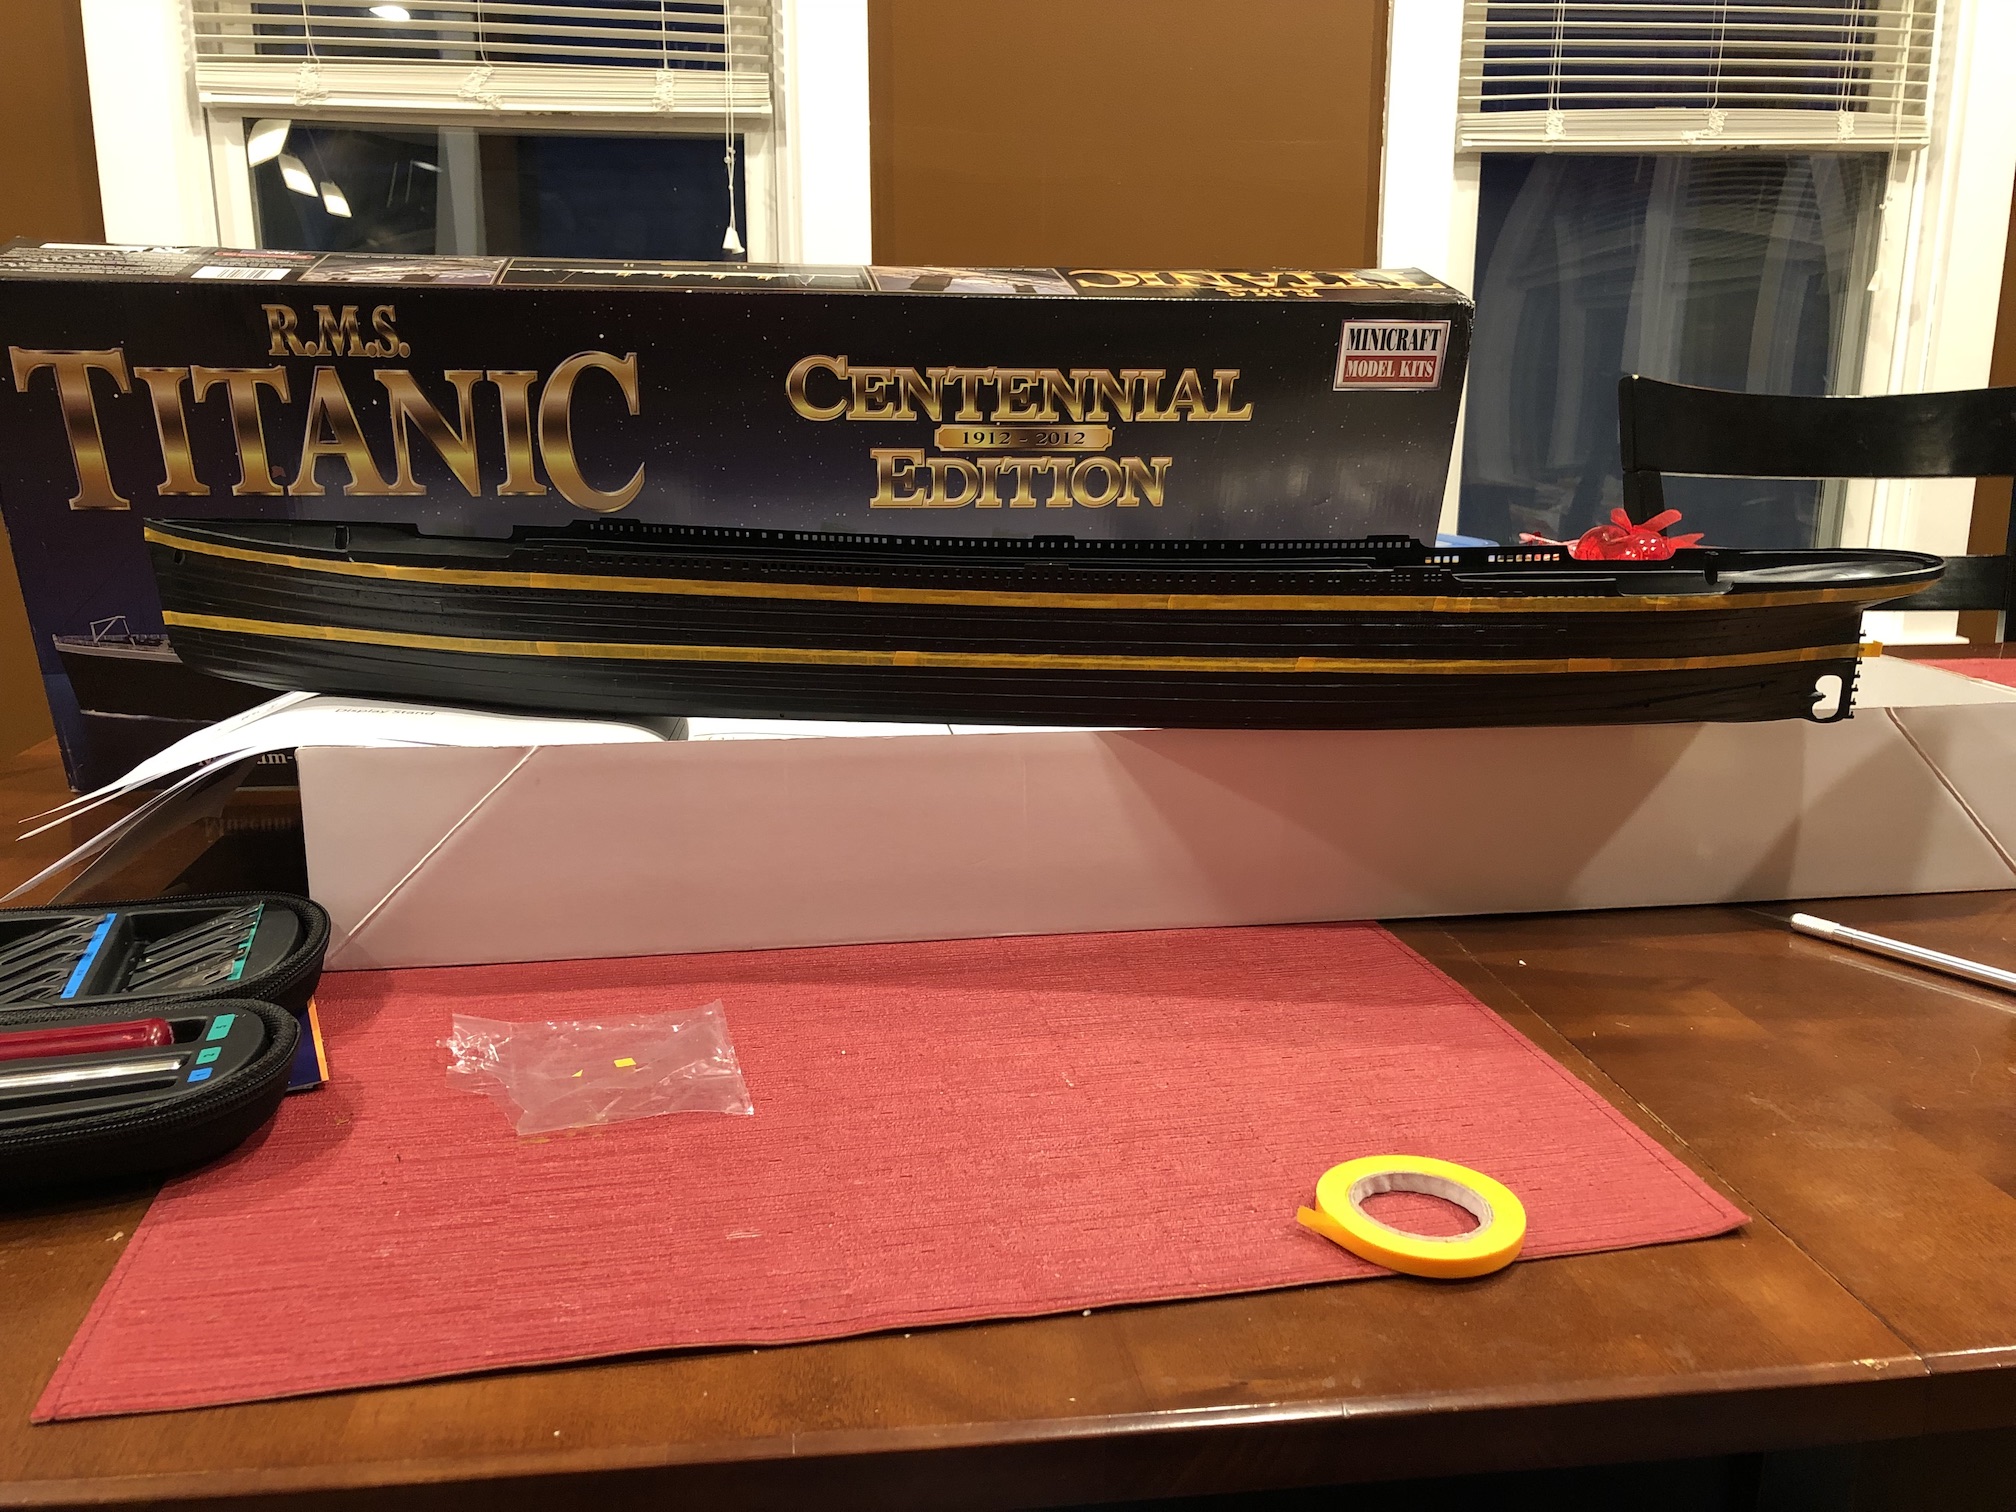
It all started back in 2016 when I was staying in a hotel in Redmond, Washington. I was there on business working about 15 minutes away in Kirkland, on the outskirts of Seattle. I worked from Kirkland for two weeks, flew home for a weekend, then flew back. That left every other weekend on my own, so I often wandered around the area exploring. One day I came across a hobby shop that sold models and found my Ship of Dreams: a 1:350 scale Titanic.
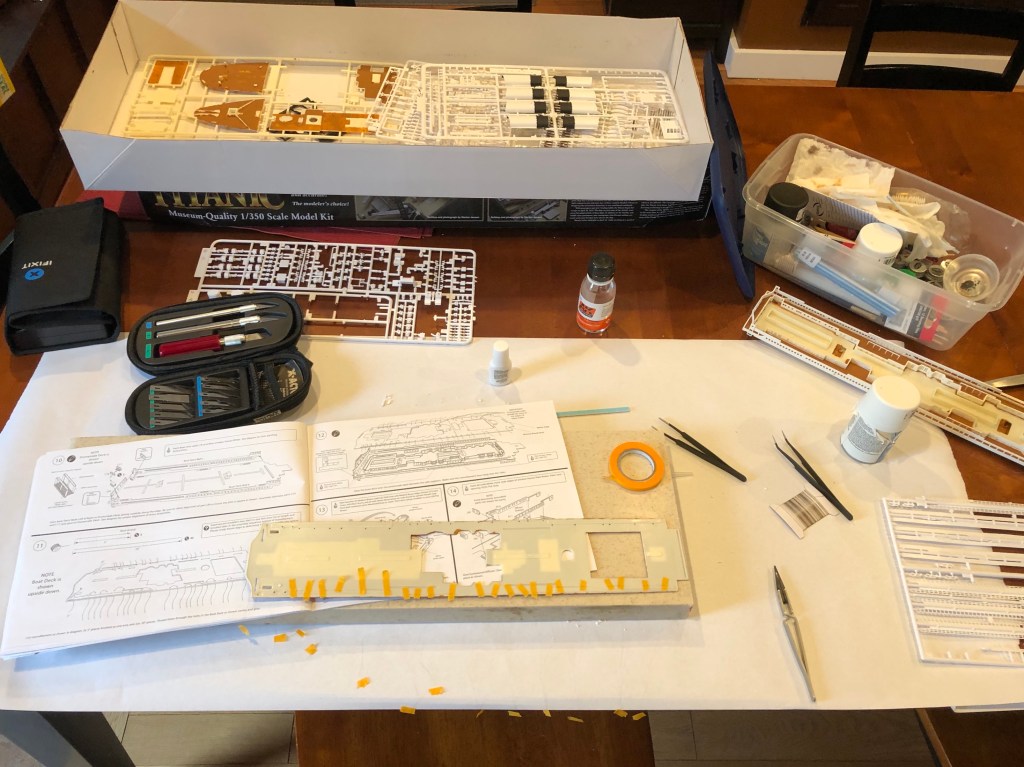
I bought it for $80 and walked it back to my hotel room, eager to open it and explore. The photos of the finished model on the box looked spectacular and detailed; I couldn’t wait to see them up close. Most pieces were attached to rectangular parts trees but the hull was one solid black piece almost three feet long. From it I could see the entire shape of the ship. I pored over the instruction manual, learning how all the pieces fit together. I contemplated the other materials I needed to buy – paint, brushes, an Xacto knife.
Then I promptly put the model away. I looked at it a few more times and eventually shipped it back home untouched. I returned a few months later, finished with my assignment, and took a week off by myself to decompress. I was still very excited about steam ships and spent part of the week watching documentaries and videos while building my own steamship out of Legos. The model, however, remained untouched. I put it in the basement. I didn’t buy paint. I didn’t build it.
Why not? If I was so excited, a week off would have been the perfect time to build it. I didn’t build it because I was intimidated by it and I didn’t feel ready. It was so intricate and had so many pieces. I knew that it would take a lot of time if I wanted it to come out even average. I didn’t wan’t it to be half-assed and I didn’t want it to take 15 years at one part a month. I wanted to wait until I felt ready to invest time it for the long haul.
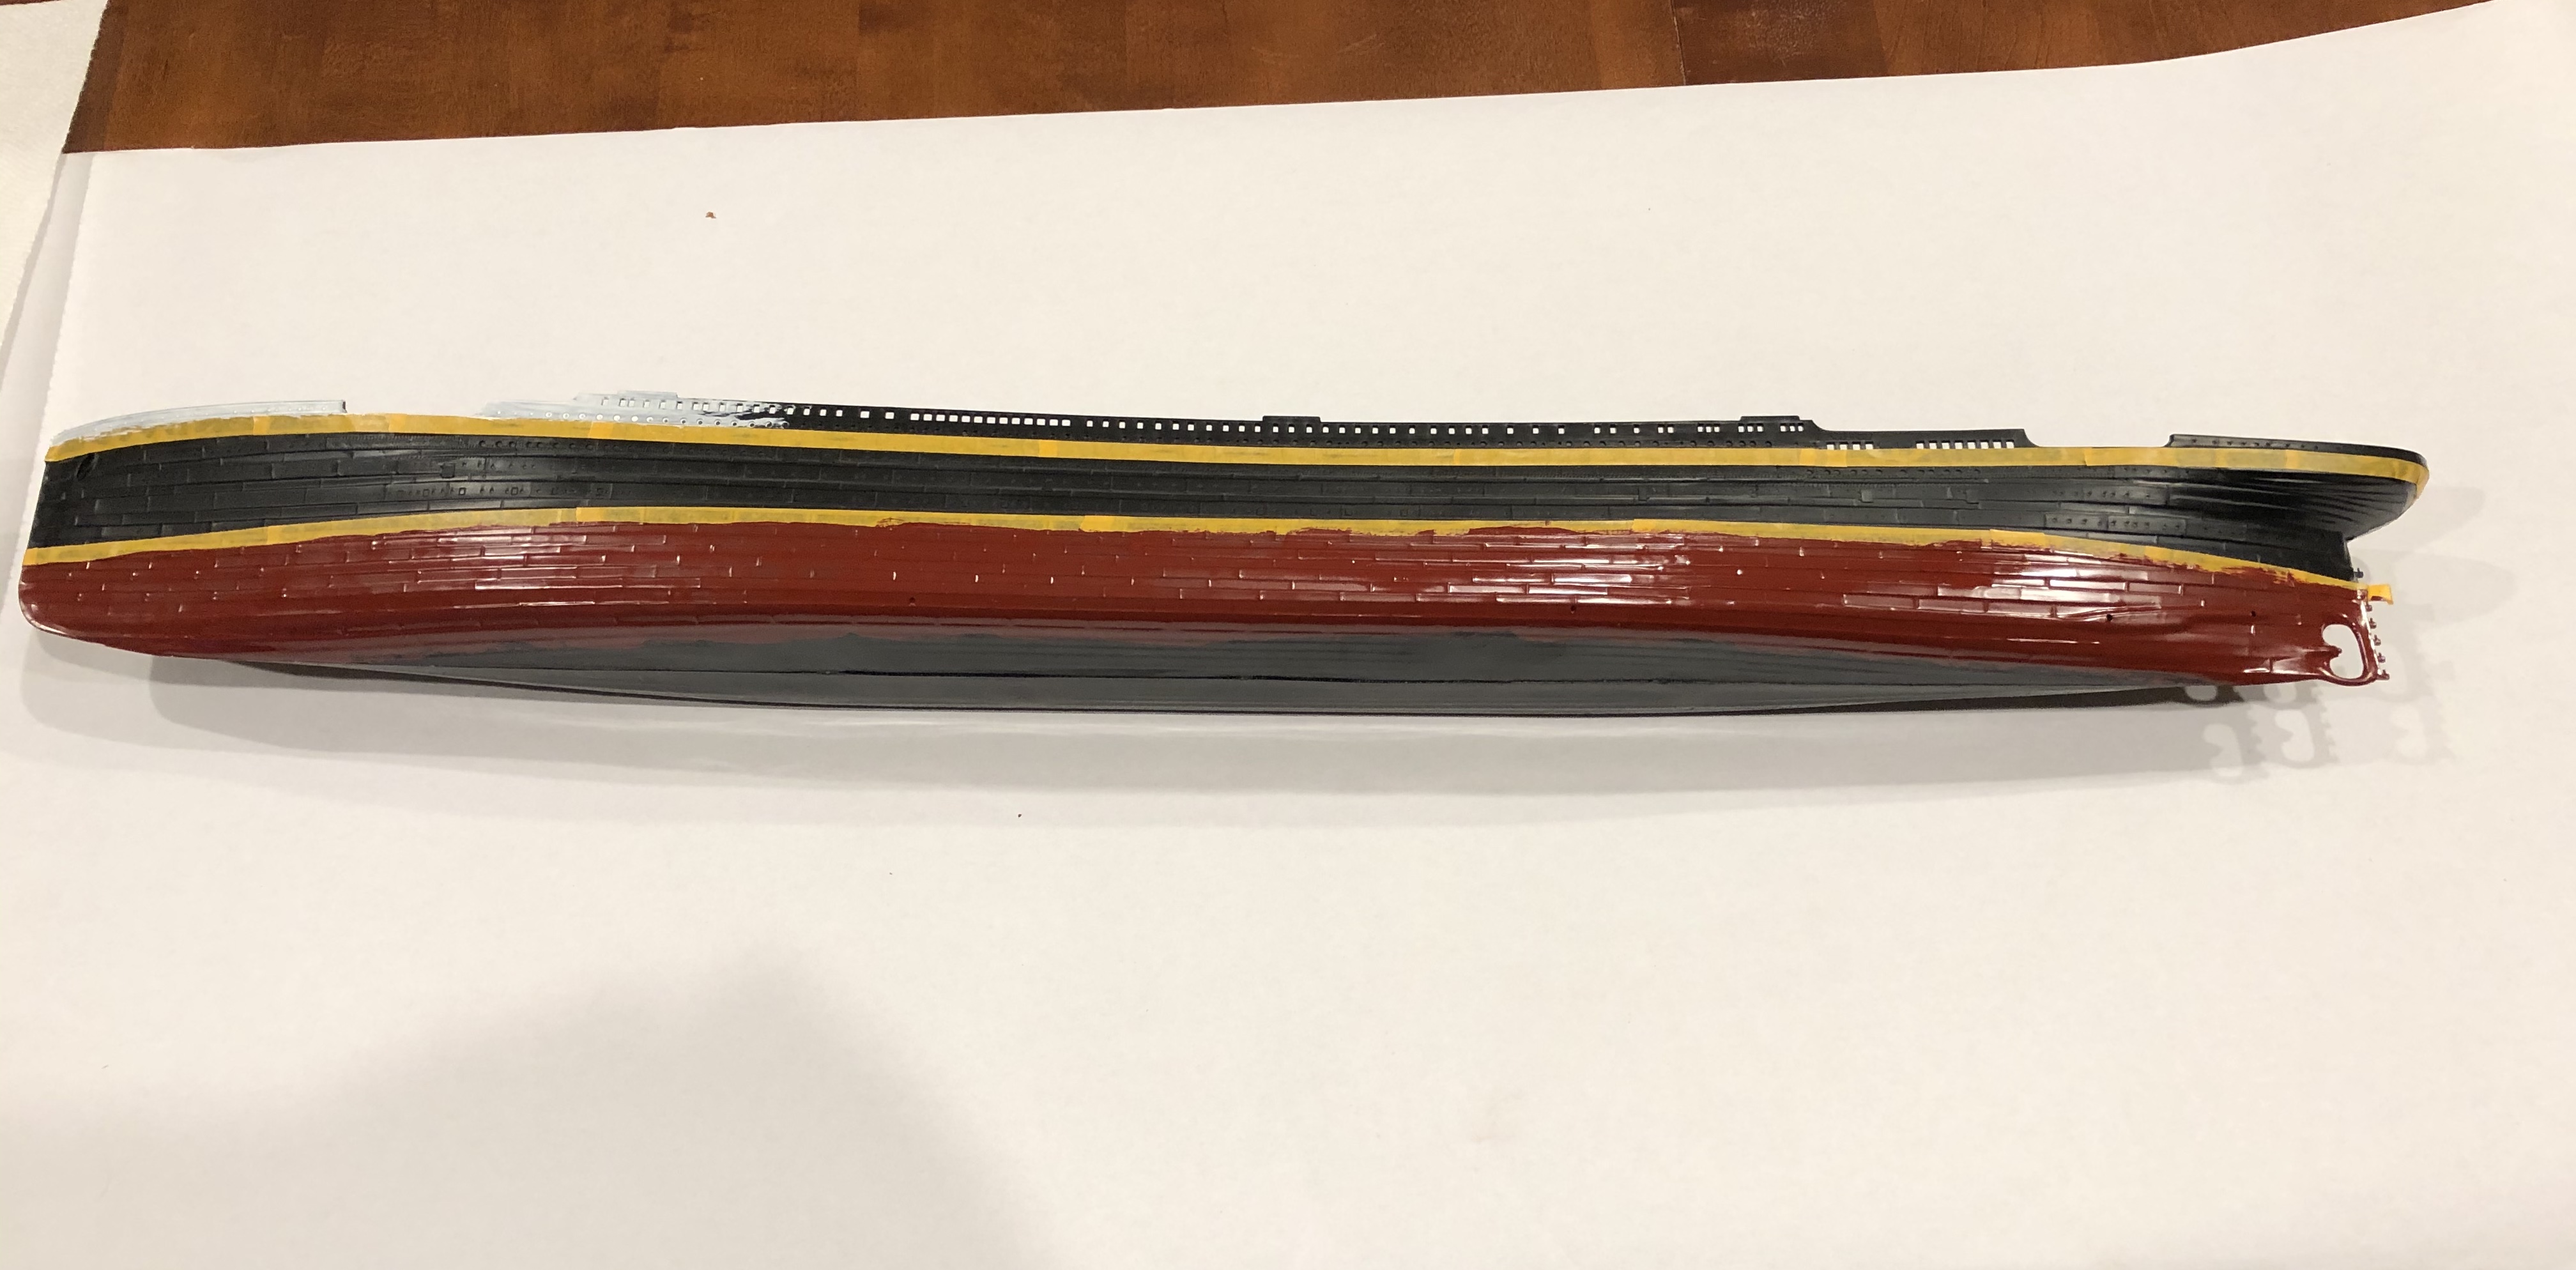


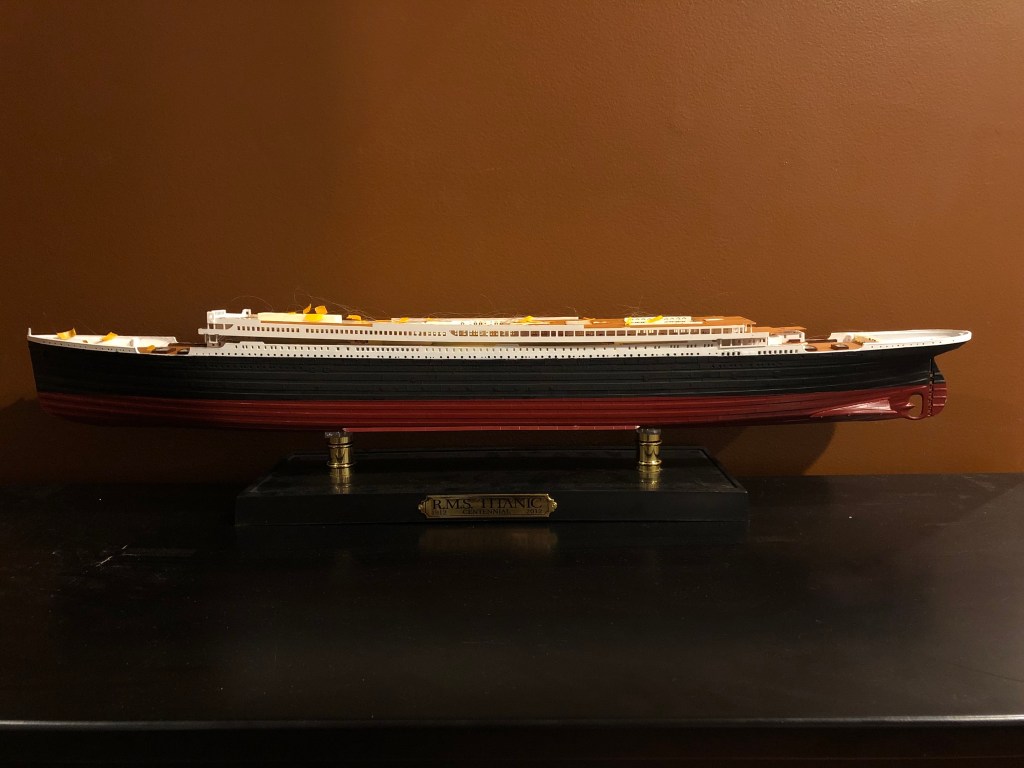
The hull through various stages of taping, painting, and the final product.
Fast forward to January of this year. It’s winter and there’s less to do outside. Our holiday events are over and weekends are free. After three years I finally felt ready to invest myself in this model. I started building model cars when I was about 10, but hadn’t worked on one since my early teenage years. I’d describe my models from that time as, well, bad. I was so excited to get them together that I rushed and cut corners like crazy. I never painted parts ahead of time, resulting in bad edges and bleed all over the place. I didn’t like to do multiple coats, so I glopped the color on or left streaks. I used waaay too much liquid cement which squirted out of seams and left web-like streams of glue everywhere. My models of that era were terrible.
The Titanic was going to be different. I wasn’t 12 years old anymore and I was going to try this time. I read up on what tools to get, what kind of glue to use, and what techniques were best. I bought the colors recommended by the instructions, found model brushes, some thin painter’s tape, and a whole set of Xacto knives. I planned to pre-paint all of the parts, cut off all of the sprues, use super glue, and really try my best.

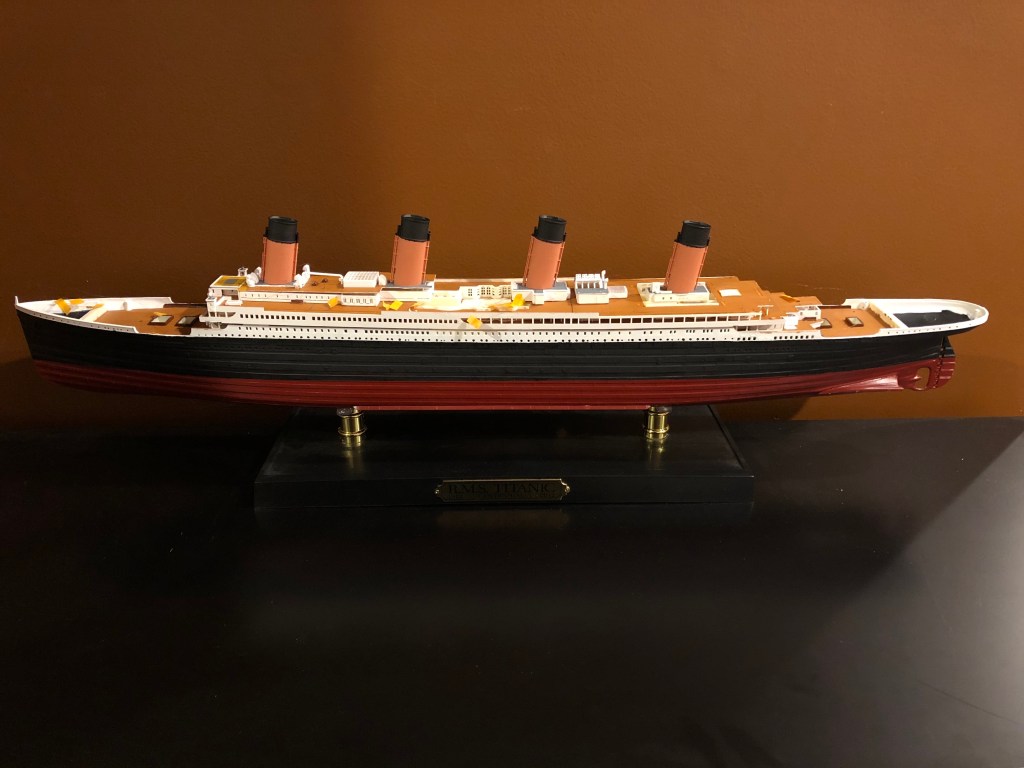
I started the model in January and have stuck to my goals since. My model is very much an amateur model, but it is the best I’ve ever done. And it’s taken a lot of work. I hand-painted the hull red, white, and black (even though the plastic was already black) and it took me a couple of weeks. The white deck took 8 coats for full coverage and the antifouling red under the water line took four. I smartened up when I painted the parts for the white superstructure and used spray paint instead – much faster with much better coverage.
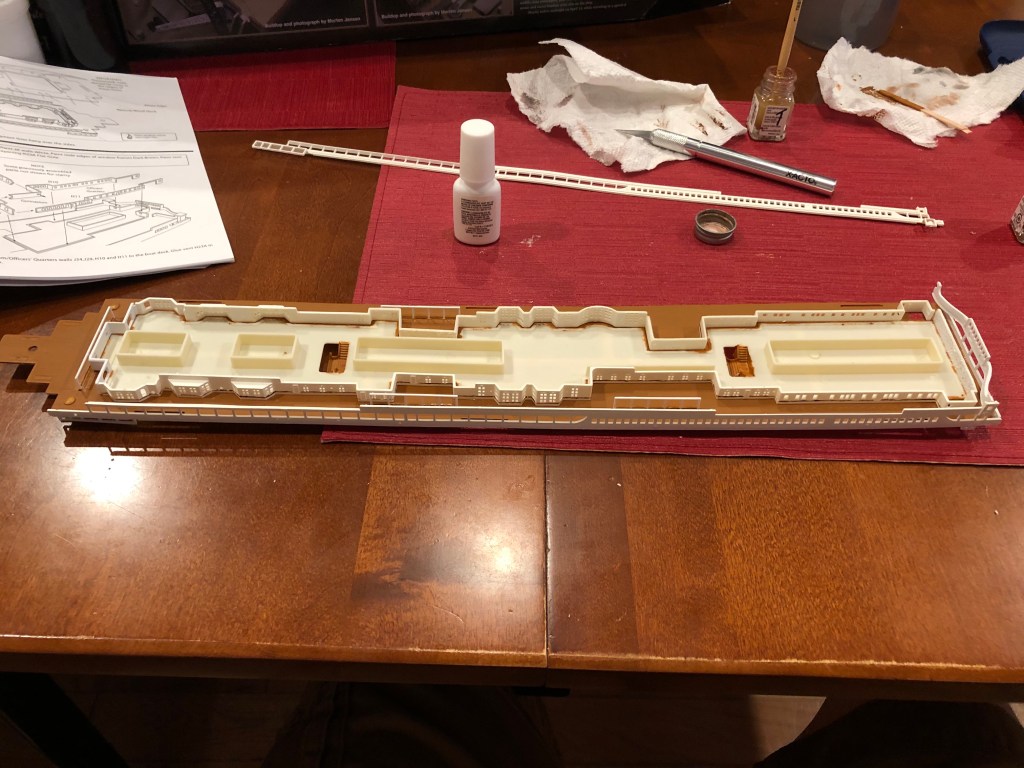
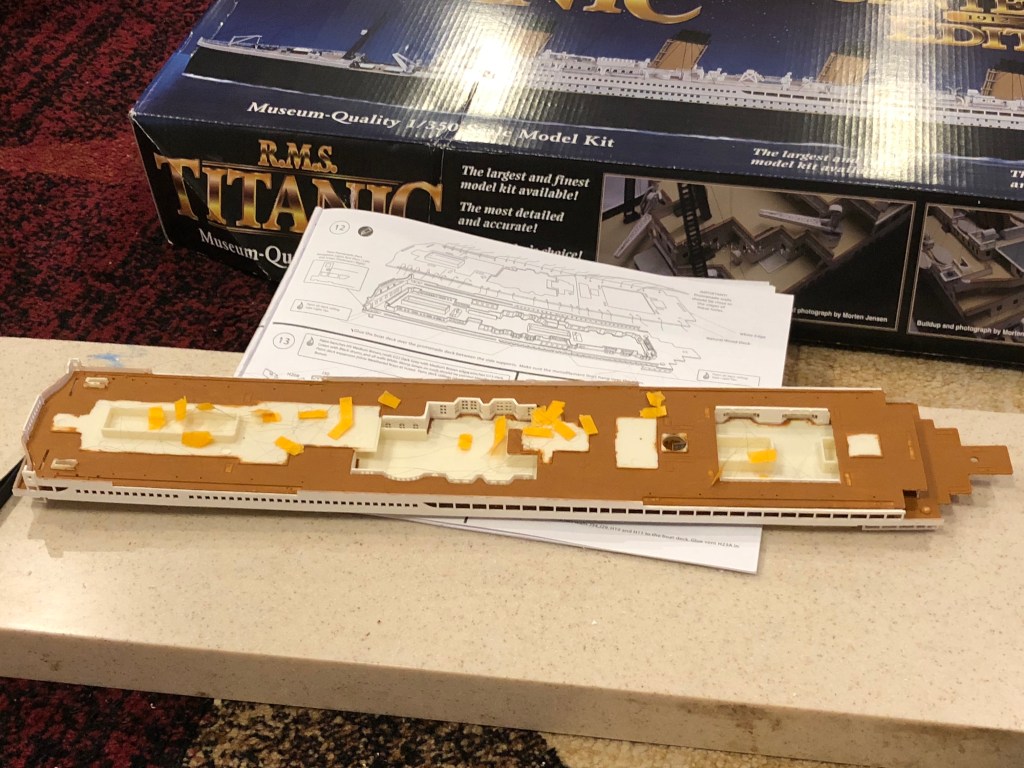
While many of the parts are white, there are a lot of small details in different colors to be applied, as well as the decks, which all need to be brown. This creates a bit of an orchestration problem. You see, if I need to assemble an area that consists of a deck and a small structure with a roof, I usually need brown for the deck, white for the walls, gray for the roof above, white for the edges of the roof, and then white for the vents. If I painted every piece on-demand, I’d be switching colors and brushes all the time, while feeling like I’m getting nothing done.
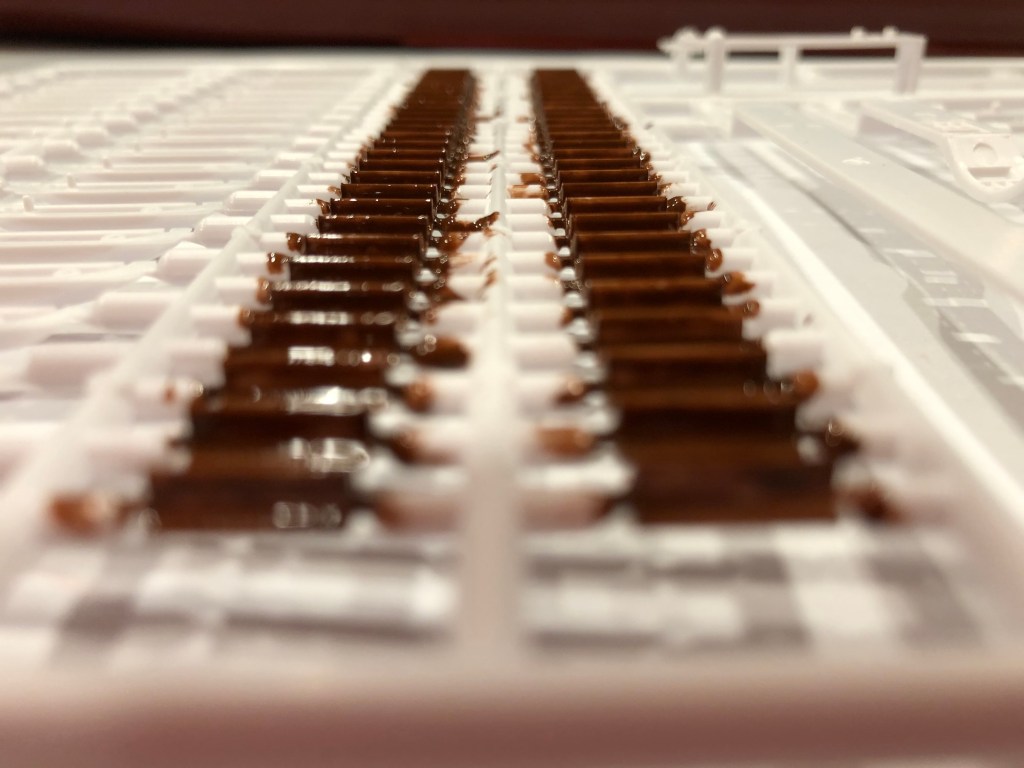


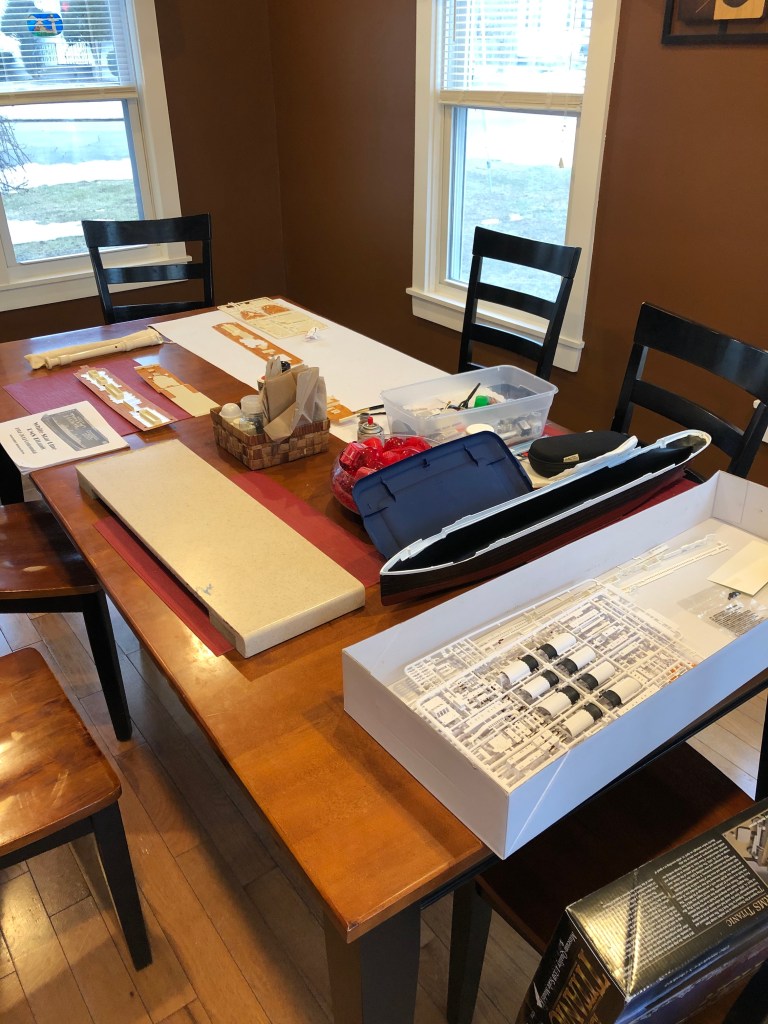
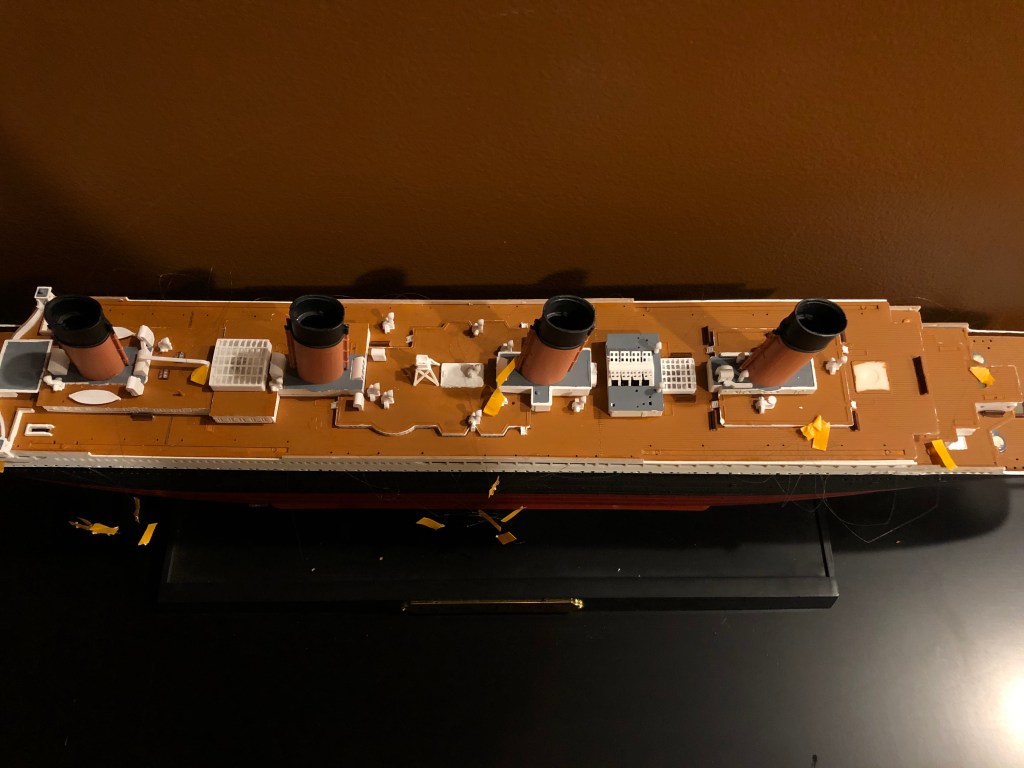
To remedy this, I batched my painting. I spent a couple days just painting all of the decks with 3-4 coats of brown, a day painting all of the benches, an hour painting black on all of the smoke stacks, and countless other hours batching paint across the entire model. I painted parts that I wouldn’t need until the end just because they were the current color I had open. It made the beginning of the process pretty slow but has started to show an advantage towards the middle. This process creates distinct phases – sometimes I’m just painting a coat, waiting for it to dry, painting another, switching colors, and then doing it over again across ten different parts. Other times I’m just cutting and gluing parts. The result is that sometimes very little construction happens on the model and then suddenly a bunch of things are suddenly complete.
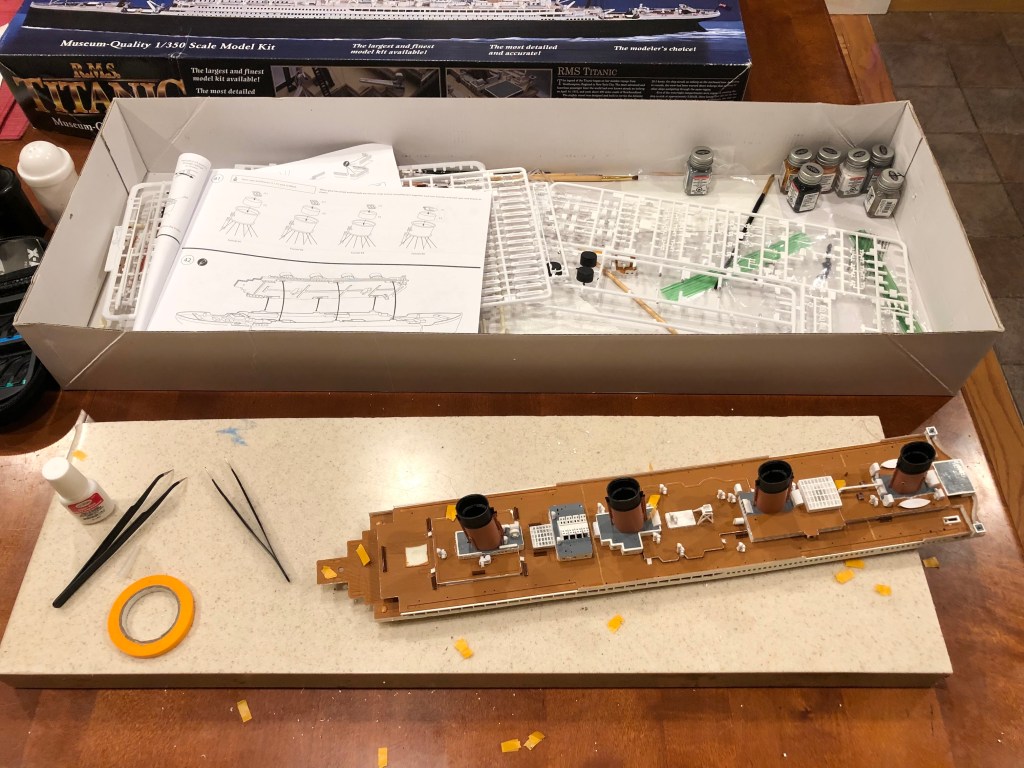
It’s been quite an experience so far. I’m probably 75% through the major features of the ship but only 50% through the details. It’s taken me 35 – 40 hours. I’ve got the majority of the hull, the superstructure, the bridge, four of the funnels, and the majority of vents and machines on the deck. The superstructure isn’t glued in place yet, doesn’t have any railings (there are a lot), the rigging isn’t complete and the bow and stern aren’t done.


Things I’ve learned:
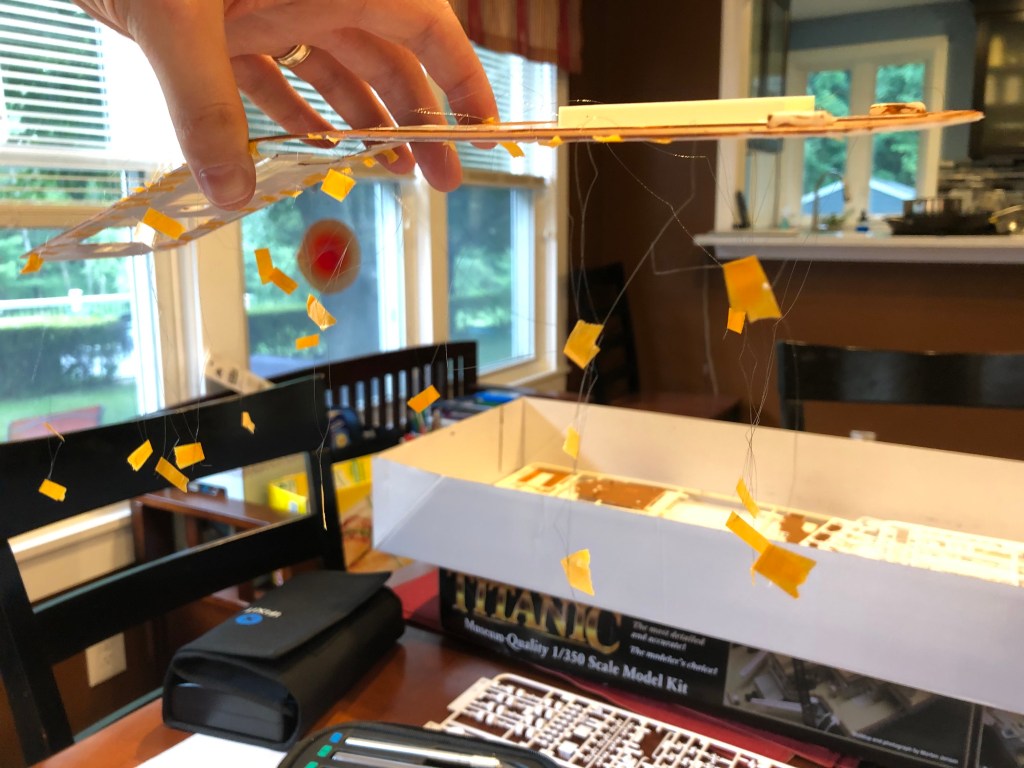
- Monofilament is a pain in the ass, but putting tape on the ends helps keep it organized a little bit. There is no such thing as making a knot in it (at least for me), so I just taped it to the underside of various pieces where it wouldn’t be seen and then glued it.
- Test-fitting pieces before gluing them is very important. I have an entire deck that isn’t quite aligned correctly that I had to shave down a bit. I learned my lesson and started test fitting and shaving before gluing. The result has been a lot of tiny detail work with Xacto knives and a few cuts on my fingers.
- The instructions sometimes leave a lot to be desired. A few of the pieces were not labeled and others didn’t clearly show their orientation. The paint instructions also didn’t always match the photos on the box. Monofilament was also a challenge because the instructions would show only one hole to pass the string through but the piece had three clustered together. Which to use?
- Plastic has its limits and some of the parts were just made badly. Some were warped and others didn’t always fit together properly, leaving gaps. There is even a gap on the professionally made example model on the box!
Despite the difficulty and all of the learning I still really enjoy it. Sally and the boys can watch TV in the living room while I’m putting little details on in the dining room still hearing what they’re watching. I’m learning a huge amount about the ship itself in terms of its layout and shapes. Did you know that each funnel has a large vent facing forward and most have smaller cowl vents around them facing aft? I didn’t. It’s actually really fun because I feel like I’m more acquainted with the ship. Makes it easier to imagine being on it.


Is this model my best? Based on hat I knew in January, yes, it is. I’ve learned a lot so far and I know my next model will be much, much better. I’ll have a better idea of where I’m going and what not to do. I can almost guarantee that I’ll make another model of the Titanic in my life and I’ll apply all of my learnings from this one to it. This is just a rough draft, after all.

One Reply to “”